If you are part of an Atlassian shop - running Jira for tickets, Confluence for docs, maybe Trello for quick boards - then Bitbucket Pipelines is the CI/CD system that already lives inside your workflow. No extra vendor. No separate billing. No login to Yet Another Dashboard.
This bitbucket pipelines guide walks you through setting up real CI/CD workflows from scratch in 2026, with copy-paste YAML templates, honest cost breakdowns, and a direct comparison against GitHub Actions and Azure DevOps so you can decide whether Bitbucket is the right fit.
Why Bitbucket Pipelines?
Bitbucket Pipelines Guide walks through the complete process from initial configuration to advanced usage, doubling as a quick Bitbucket Pipelines reference you can come back to. Whether you are starting fresh or optimizing an existing setup, this walkthrough covers every decision point, common pitfall, and the Bitbucket Pipelines variables and settings that make the biggest difference.
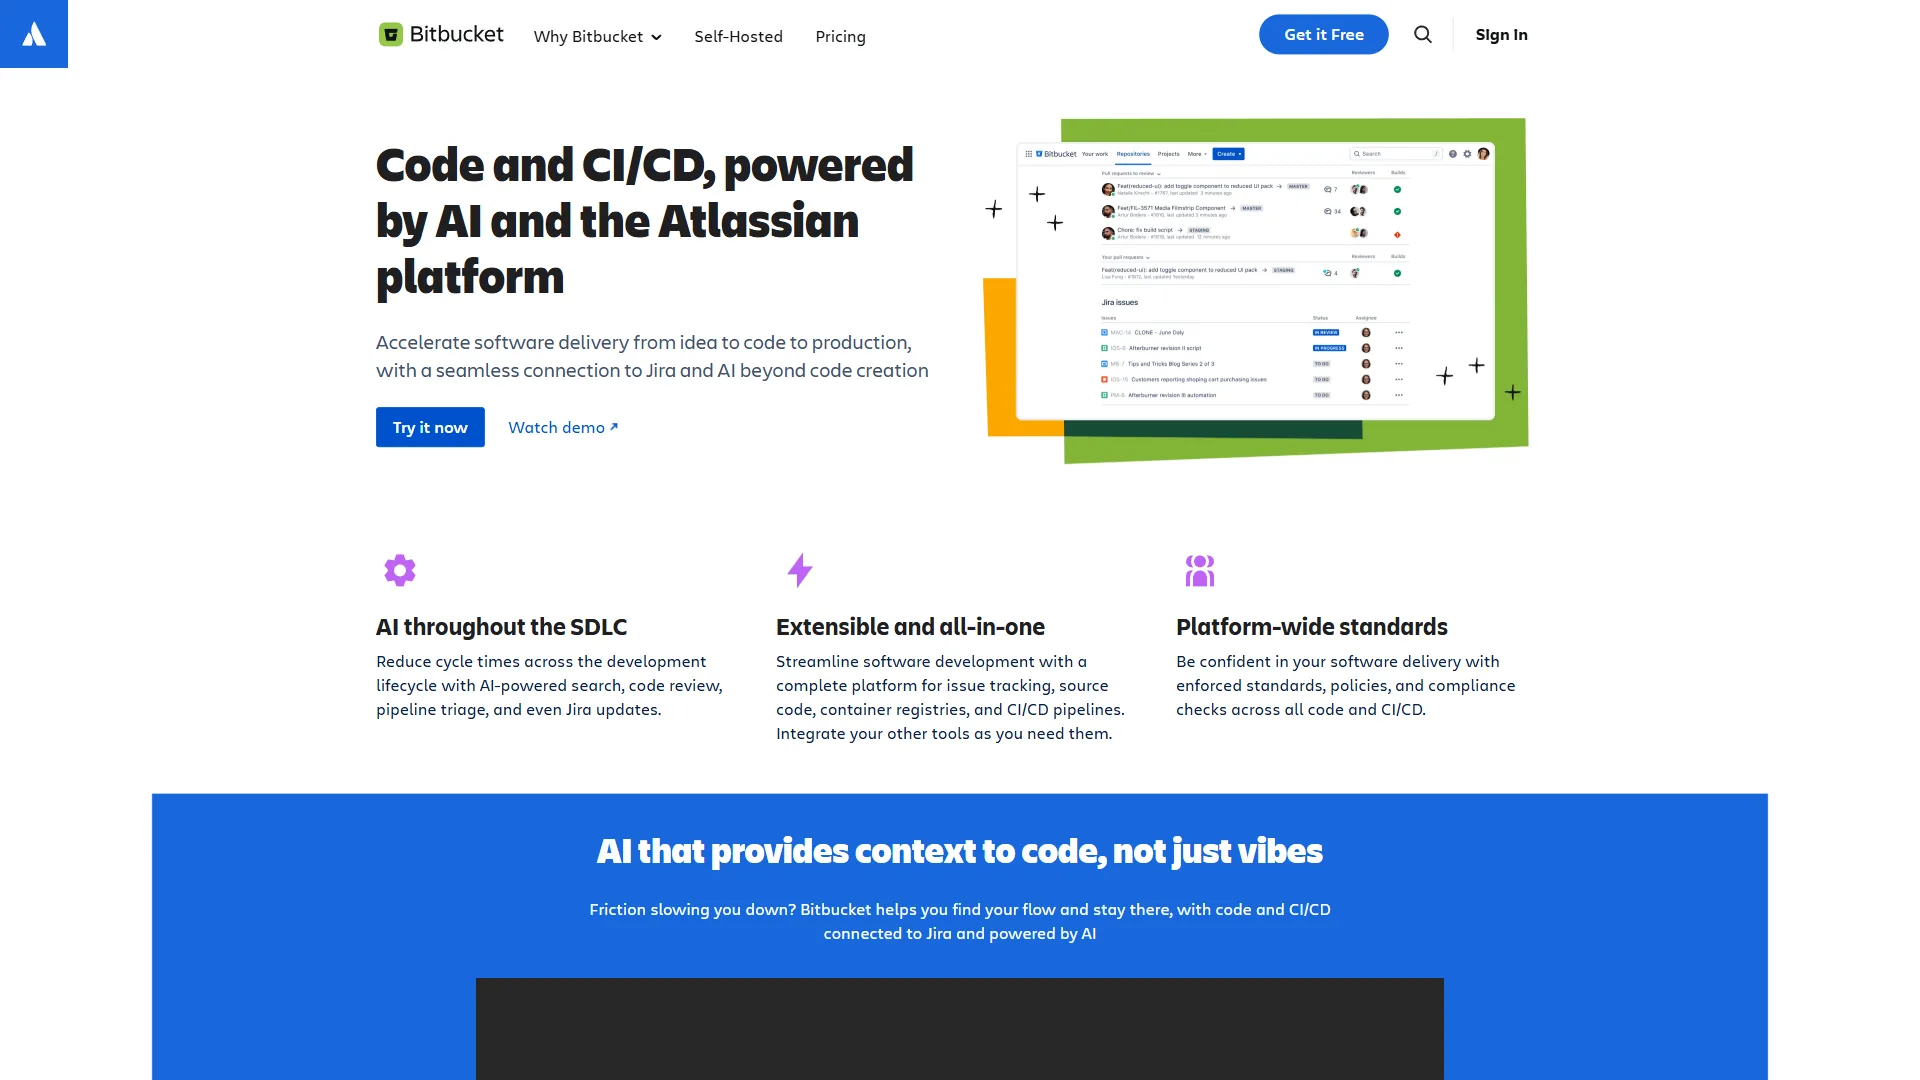
Bitbucket Pipelines is Atlassian’s built-in CI/CD service. It runs directly inside your Bitbucket Cloud repositories - no plugins, no third-party integrations, no server to maintain. You define your build, test, and deploy steps as a Bitbucket Pipelines script in a single bitbucket-pipelines.yml file at the root of your repo, and Bitbucket handles the rest.
For teams already embedded in Atlassian’s ecosystem, that tight coupling is the entire selling point. Push a commit, and the pipeline runs. The build status shows up in your Jira ticket automatically. Deployment tracking feeds into Confluence. Everything stays connected without duct tape. Our Atlassian tools for developers guide covers the wider ecosystem.
Where Bitbucket Pipelines shines:
- Atlassian integration - Jira issue keys in commit messages link builds to tickets automatically
- Docker-native - Every pipeline step runs in a Docker container, so your build environment is always clean and reproducible
- Built-in deployment tracking - Track which commits are deployed to which environments without extra tooling
- Simple pricing - Build minutes are included in your Bitbucket plan, not a separate line item
Where it falls short:
- Smaller marketplace compared to GitHub Actions (hundreds vs. thousands of integrations)
- Self-hosted runners require more setup than GitHub’s equivalent
- The free tier only gives you 50 build minutes per month - tight for active projects
How Do You Set Up Your First Bitbucket Pipeline?
Let’s get a working pipeline running. This section assumes you already have a Bitbucket Cloud repository. If you are starting from scratch, create one at bitbucket.org.
Step 1: Create the Pipeline File
Add a bitbucket-pipelines.yml file to the root of your repository:
image: node:20

pipelines:
  default:
    - step:
        name: Build and Test
        caches:
          - node
        script:
          - npm ci
          - npm run build
          - npm test
That is it. Five meaningful lines of configuration and you have a CI pipeline. Every push to any branch will trigger this pipeline, install dependencies, build your project, and run tests.
Step 2: Understanding the Structure
Here is what each piece does:
image- The Docker image your steps run inside. Use official images from Docker Hub (node:20,python:3.12,maven:3.9).pipelines- The top-level container for all your pipeline definitions.default- Runs on every push to every branch unless overridden by branch-specific pipelines.step- A single unit of work. Each step runs in a fresh Docker container.caches- Pre-built cache definitions (nodecachesnode_modules,pipcaches Python packages).script- The shell commands to run, in order.
Step 3: Push and Watch It Run
git add bitbucket-pipelines.yml
git commit -m "Add CI pipeline"
git push origin main
Navigate to your repository in Bitbucket Cloud, click Pipelines in the left sidebar, and you will see your first build running in real time.
Which Bitbucket Pipelines YAML Templates Work Best for Real Projects?
Here are four templates covering the most common scenarios. Each one is production-tested and ready to paste into your repo.
Template 1: Branch-Based Deployments
Deploy to staging on develop pushes, production on main:
image: node:20

pipelines:
  branches:
    develop:
      - step:
          name: Deploy to Staging
          deployment: staging
          caches:
            - node
          script:
            - npm ci
            - npm run build
            - pipe: atlassian/scp-deploy:1.4.0
              variables:
                USER: $STAGING_USER
                SERVER: $STAGING_HOST
                REMOTE_PATH: /var/www/staging
                LOCAL_PATH: dist

    main:
      - step:
          name: Run Tests
          caches:
            - node
          script:
            - npm ci
            - npm test
      - step:
          name: Deploy to Production
          deployment: production
          trigger: manual
          script:
            - npm ci
            - npm run build
            - pipe: atlassian/scp-deploy:1.4.0
              variables:
                USER: $PROD_USER
                SERVER: $PROD_HOST
                REMOTE_PATH: /var/www/production
                LOCAL_PATH: dist
Key details:
- The
deploymentkeyword enables environment tracking in Bitbucket’s UI trigger: manualadds an approval gate before production deployments- Variables like
$STAGING_USERare stored in Repository Settings, then Pipelines, then Repository Variables
Template 2: Python with Multiple Versions
Test against multiple Python versions using parallel steps:
image: python:3.12

pipelines:
  default:
    - parallel:
        - step:
            name: Python 3.10
            image: python:3.10
            caches:
              - pip
            script:
              - pip install -r requirements.txt
              - pytest --cov=src --cov-report=xml
        - step:
            name: Python 3.11
            image: python:3.11
            caches:
              - pip
            script:
              - pip install -r requirements.txt
              - pytest --cov=src --cov-report=xml
        - step:
            name: Python 3.12
            image: python:3.12
            caches:
              - pip
            script:
              - pip install -r requirements.txt
              - pytest --cov=src --cov-report=xml
The parallel keyword runs all three steps simultaneously, using three separate build minutes allocations but finishing in the time of the slowest step.
Template 3: Docker Build and Push
Build a Docker image and push it to a container registry:
image: atlassian/default-image:4

pipelines:
  branches:
    main:
      - step:
          name: Build and Push Docker Image
          services:
            - docker
          caches:
            - docker
          script:
            - export IMAGE_TAG=$BITBUCKET_COMMIT
            - docker build -t $DOCKER_REGISTRY/$IMAGE_NAME:$IMAGE_TAG .
            - docker tag $DOCKER_REGISTRY/$IMAGE_NAME:$IMAGE_TAG $DOCKER_REGISTRY/$IMAGE_NAME:latest
            - echo $DOCKER_PASSWORD | docker login -u $DOCKER_USERNAME --password-stdin $DOCKER_REGISTRY
            - docker push $DOCKER_REGISTRY/$IMAGE_NAME:$IMAGE_TAG
            - docker push $DOCKER_REGISTRY/$IMAGE_NAME:latest

definitions:
  services:
    docker:
      memory: 2048
Note the services block - Docker-in-Docker requires declaring docker as a service. The definitions section at the bottom lets you increase the memory allocation for the Docker service from the default 1024 MB.
Template 4: Monorepo with Conditional Steps
Only build what changed - critical for monorepos:
image: node:20

pipelines:
  default:
    - step:
        name: Build Frontend
        condition:
          changesets:
            includePaths:
              - "frontend/**"
        caches:
          - node
        script:
          - cd frontend
          - npm ci
          - npm run build
          - npm test
    - step:
        name: Build Backend
        condition:
          changesets:
            includePaths:
              - "backend/**"
        caches:
          - node
        script:
          - cd backend
          - npm ci
          - npm run build
          - npm test
The condition.changesets feature checks which files changed in the commit and only runs steps that match. This saves build minutes and keeps pipelines fast in 2026 monorepo setups.
Cost Breakdown: What You Actually Pay
Build minutes are where Bitbucket Pipelines pricing gets real. Here is the full picture:
| Plan | Price | Build Minutes | Users | Best For |
|---|---|---|---|---|
| Free | $0 | 50/month | Up to 5 | Side projects, experimentation |
| Standard | $3/month/user | 2,500/month | Unlimited | Growing teams |
| Premium | $6/month/user | 3,500/month | Unlimited | Teams needing merge checks, IP controls |
Additional build minutes cost $10 per 1,000 minutes if you run over your allocation.
The 2x multiplier problem: Build steps using services (like Docker) or larger runner sizes consume minutes at a higher rate. A step using a 2x size runner burns 2 minutes for every 1 minute of wall-clock time. Keep this in mind when estimating costs for Docker-heavy workflows.
Cost Optimization Tips
- Use caching aggressively - The
cacheskeyword is free and can cut build times by 60-80% - Use
condition.changesets- Skip steps when irrelevant files change - Parallelize wisely - Parallel steps use more minutes total but finish faster
- Set step size correctly - Only use
2xmemory when you actually need it - Avoid unnecessary triggers - Use branch-specific pipelines instead of
defaultwhen possible
A team of 10 developers on the Standard plan (billed per user) gets 2,500 build minutes. If your average pipeline takes 5 minutes, that is 500 pipeline runs per month - roughly 25 per working day. For most small-to-mid teams, that is more than enough. For broader CI/CD automation beyond pipelines, our best workflow automation tools roundup covers platforms that complement your build system.
Bitbucket Pipelines vs. GitHub Actions vs. Azure DevOps
Here is an honest comparison for teams evaluating their options in 2026.
| Feature | Bitbucket | GitHub | Azure DevOps |
|---|---|---|---|
| Free build minutes | 50/month | 2,000/month | 1,800/month (1 parallel job) |
| Paid plan | Standard at $3/month/user | $4/user/month (Team) | $6/user/month (Basic) |
| Build minutes on paid | 2,500/month | 3,000/month | Unlimited (with parallel jobs) |
| Container-native | Yes (Docker by default) | Yes (Docker supported) | Yes (Docker + VM agents) |
| Self-hosted runners | Yes | Yes | Yes |
| Marketplace integrations | ~100 Pipes | 15,000+ Actions | ~1,000 extensions |
| Best ecosystem | Atlassian (Jira, Confluence) | GitHub (Copilot, Issues) | Microsoft (Azure, VS) |
Azure DevOps offers a more comprehensive ALM suite with boards, repos, test plans, and artifacts alongside its pipelines.
When to Pick Bitbucket Pipelines
Choose Bitbucket if:
- Your team already uses Jira, Confluence, or other Atlassian tools
- You want CI/CD baked into your source control without extra vendors
- Docker-native pipelines matter to your workflow
- Your team is under 20 people and cost-sensitivity is high
Choose GitHub Actions if:
- You need the largest ecosystem of pre-built integrations
- Open-source projects are a priority (unlimited free minutes on public repos)
- You want GitHub Copilot integration across your dev workflow - see our best AI coding assistants comparison for how Copilot stacks up
Choose Azure DevOps if:
- You are deploying to Azure cloud services
- You need a complete ALM suite (boards, repos, pipelines, test plans, artifacts)
- Enterprise compliance and audit trails are non-negotiable
Advanced Patterns
Once your basic pipelines are running, these patterns will help you scale.
Variables and Secrets Management
Store sensitive values in Repository Settings, then Pipelines, then Repository Variables. Never commit secrets to your bitbucket-pipelines.yml file.
pipelines:
  default:
    - step:
        script:
          - echo "Deploying to $DEPLOY_ENV"
          - ./deploy.sh --api-key $API_KEY --env $DEPLOY_ENV
Secured variables (marked as secured in the UI) are masked in build logs and cannot be read after creation. Use them for API keys, passwords, and tokens.
Deployment variables can be scoped to specific environments. A variable named DB_HOST can have different values for staging and production environments.
Pipes - Bitbucket’s Reusable Integrations
Pipes are Bitbucket’s equivalent of GitHub Actions marketplace items. They are pre-built Docker containers that handle common tasks:
- step:
    name: Deploy to AWS S3
    script:
      - pipe: atlassian/aws-s3-deploy:1.1.0
        variables:
          AWS_ACCESS_KEY_ID: $AWS_ACCESS_KEY_ID
          AWS_SECRET_ACCESS_KEY: $AWS_SECRET_ACCESS_KEY
          AWS_DEFAULT_REGION: us-east-1
          S3_BUCKET: my-bucket
          LOCAL_PATH: dist
Popular pipes include:
atlassian/aws-s3-deploy- Deploy static sites to S3atlassian/slack-notify- Send Slack notifications on build statusatlassian/scp-deploy- Copy files to remote servers via SCPatlassian/aws-ecs-deploy- Deploy to AWS ECS clustersatlassian/heroku-deploy- Deploy to Heroku
The full list is available in the Bitbucket Pipes directory.
Artifacts Between Steps
Pass build outputs from one step to the next using artifacts:
pipelines:
  default:
    - step:
        name: Build
        script:
          - npm ci
          - npm run build
        artifacts:
          - dist/**
    - step:
        name: Deploy
        deployment: production
        script:
          - ls dist/
          - pipe: atlassian/aws-s3-deploy:1.1.0
            variables:
              S3_BUCKET: my-production-bucket
              LOCAL_PATH: dist
Artifacts persist between steps in the same pipeline but not between separate pipeline runs. If you need persistent storage, push artifacts to an external service like S3 or a container registry.
Jira Integration (The Atlassian Advantage)
This is where Bitbucket Pipelines earns its keep for Atlassian teams. Include a Jira issue key in your commit message:
git commit -m "PROJ-123 Add user authentication"Bitbucket automatically:
- Links the commit to Jira issue PROJ-123
- Shows the build status on the Jira ticket
- Tracks which environments the change has been deployed to
- Updates the Jira issue’s development panel with branch, commit, and PR info
No configuration required - it works out of the box when your Bitbucket and Jira accounts are connected through Atlassian’s platform.
Troubleshooting Common Issues in This Bitbucket Pipelines Guide
Pipeline Not Starting
Check these first:
- Verify
bitbucket-pipelines.ymlis at the repository root (not in a subdirectory) - Validate YAML syntax - a single indentation error will silently fail. Use YAML Lint to check
- Confirm Pipelines is enabled: Repository Settings, then Pipelines, then Settings, then Enable Pipelines
- Check if you have exceeded your build minutes quota
Out of Memory Errors
If your step crashes with an out-of-memory error, increase the step size:
- step:
    name: Build Large Project
    size: 2x
    script:
      - npm ci
      - npm run build
Available sizes: 1x (4 GB RAM, default), 2x (8 GB RAM), 4x (16 GB RAM, Premium plans only), 8x (32 GB RAM, Premium plans only). Remember that larger sizes consume minutes faster.
Slow Builds
Common fixes for builds that take too long:
- Add caching for package managers (
node,pip,maven,gradle) - Use a smaller base image (
node:20-sliminstead ofnode:20) - Skip unnecessary steps with
condition.changesets - Run steps in parallel when they do not depend on each other
Docker Service Issues
If Docker builds fail, check that:
- You have declared
dockeras a service - The Docker service has enough memory (default 1024 MB may be too low)
- You are using
atlassian/default-image:4or another image with Docker CLI pre-installed
Security Best Practices
- Use secured variables for all secrets - they cannot be read after creation and are masked in logs
- Scope deployment variables to specific environments so staging secrets cannot leak to production
- Pin pipe versions - use
atlassian/aws-s3-deploy:1.1.0instead ofatlassian/aws-s3-deploy:latest - Enable merge checks (Premium plan) to require passing pipelines before merging
- Restrict who can push to
mainusing branch permissions in Repository Settings - Review third-party pipes before using them - check the source repository and maintainer
Real-World ROI for a 5-Person Team
Let’s calculate the actual impact for a small team running Bitbucket Standard in 2026:
Before automation:
- Manual test runs: 10 min/deploy
- Manual staging deployment: 15 min
- Manual production deployment: 15 min
- Deploys per week: 10
- Weekly time spent: 400 minutes (6.7 hours)
After Bitbucket Pipelines:
- Push code: 1 min
- Pipeline runs automatically: 0 min active time
- Review and approve production: 2 min
- Deploys per week: 10 (but can scale to 30+)
- Weekly time spent: 30 minutes
Time saved: 6.2 hours per week across the team, or roughly 320 hours per year.
At $3/month per user for 5 users, that is a modest annual cost for Bitbucket Standard. At a blended developer rate of $60/hour, the time savings are worth roughly $19,200/year. That is a clear win by any measure.
The Bottom Line
Bitbucket Pipelines is not the flashiest CI/CD platform. It does not have GitHub Actions’ massive marketplace or Azure DevOps’ enterprise feature list. But for teams that already live in Atlassian’s ecosystem, it is the most frictionless path to automated builds and deployments.
The Docker-native architecture means your pipelines are reproducible from day one. The Jira integration means your project managers get deployment visibility without anyone doing extra work. And the pricing - $3/month per user with 2,500 build minutes - is hard to beat for small teams shipping regularly in 2026.
Start with the basic template from this bitbucket pipelines guide, get your tests running automatically, then expand from there. The 15 minutes it takes to set up your first pipeline will save your team hundreds of hours over the next year. If you are still deciding between hosting platforms, our GitHub vs Azure DevOps comparison covers the trade-offs for developers in detail.
Frequently Asked Questions
How do Bitbucket pipelines work?
Bitbucket Pipelines is Atlassian’s built-in CI/CD service that runs directly inside your Bitbucket Cloud repositories. You define build, test, and deploy steps in a single bitbucket-pipelines.yml file at the repo root. Push a commit and the pipeline runs automatically - build status appears in Jira tickets, and deployment tracking feeds into Confluence, all without extra integrations.
How to run a pipeline in Bitbucket?
To run a pipeline in Bitbucket, navigate to your repository in Bitbucket Cloud and click Pipelines in the left sidebar. Once your bitbucket-pipelines.yml file is in place, every push to any branch triggers the pipeline automatically. You can then watch your first build running in real time from that same Pipelines view.
What are the five stages of a development pipeline?
A typical CI/CD pipeline has five stages: source (commit triggers), build (compile and package), test (unit, integration, and security checks), staging deploy (verify in a non-production environment), and production deploy (release to end users). Bitbucket Pipelines maps each stage to a step in your bitbucket-pipelines.yml, with optional manual approval gates between stages.
How many free build minutes does Bitbucket Pipelines include?
The free tier includes 50 build minutes per month, which is tight for active projects. The Standard plan at $3/month per user bumps that to 2,500 minutes, and Premium at $6/month per user includes 3,500 minutes. Keep in mind that steps using larger runner sizes or Docker services consume minutes at a higher rate.
Does Bitbucket Pipelines integrate with Jira automatically?
Yes - when your Bitbucket and Jira accounts are connected through Atlassian’s platform, including a Jira issue key in a commit message automatically links the commit to that ticket, shows build status on the Jira issue, and tracks which environments the change has been deployed to. No extra configuration is required.
Want to learn more about Bitbucket?
Related Guides
- GitHub Actions Tutorial - Complete CI/CD setup with GitHub Actions
- Atlassian Tools for Developers - Getting the most out of the Atlassian ecosystem
- Building MCP Servers Guide - Extend AI assistants with custom tools
Related Reading
Tools covered in this article:
- Bitbucket - Atlassian’s Git platform with built-in CI/CD
- GitHub - Developer platform with GitHub Actions
- Azure DevOps - Microsoft’s end-to-end DevOps suite
- GitLab - DevOps platform with built-in CI/CD pipelines
More developer productivity guides:
- GitHub Actions Tutorial - Complete CI/CD setup with GitHub Actions
- Atlassian Tools for Developers - Getting the most out of the Atlassian ecosystem
- Bitbucket vs GitHub: Which Git Platform Fits Your Team? - Detailed comparison of Bitbucket and GitHub for team workflows
External Resources
For official documentation and updates:
- Bitbucket Pipelines Documentation - Official setup guide
- Bitbucket Pipes Directory - Browse available integrations
- Bitbucket Pricing - Current plans and build minute allocations
Related Guides
- Atlassian Tools for Developers: Jira, Confluence & Bitbucket
- Claude Code Ultraplan & Plan Mode: Complete Guide (2026)
- Cursor AI Productivity Tips 2026 - 12 Hacks Compared
- ElevenLabs Getting Started: Complete Beginners Guide
- Elevenlabs Pronunciation Dictionary: Complete 2026 Guide
- GitHub Actions Tutorial: Build a CI/CD Pipeline Fast
- Localization Workflow Automation: Complete 2026 Guide
- MLOps Tools Guide 2026: Bridge the ML Production Gap
- Murf To ElevenLabs Migration: How to Switch from Murf AI to
- Obsidian Daily Notes Workflow: Build It From Scratch