This building MCP servers guide serves as a practical walkthrough - and a useful complement to any building MCP servers guide pdf you may have saved - for creating Model Context Protocol servers from scratch using Python or TypeScript. MCP, developed by Anthropic, is an open protocol that standardizes how AI clients like Claude connect to external data sources and tools, enabling real-time data access, function execution, and integration with custom databases or APIs.
In 2026, the Model Context Protocol (MCP) is reshaping how AI assistants interact with external systems. Instead of relying solely on pre-trained knowledge, MCP enables Claude and other AI clients to access real-time data, execute functions, and work with your specific tools and databases.
If you’ve ever wished Claude could query your internal documentation, access your API, or interact with your custom tools, building MCP servers is your answer. Designed as an MCP server tutorial for beginners and experienced developers alike, this resource covers every step clearly. If you are new to Claude Code, our Claude Code tips and tricks guide covers the basics before you dive into MCP development. This building MCP servers guide walks you through creating servers from scratch, with a complete working MCP server example in both Python and TypeScript.
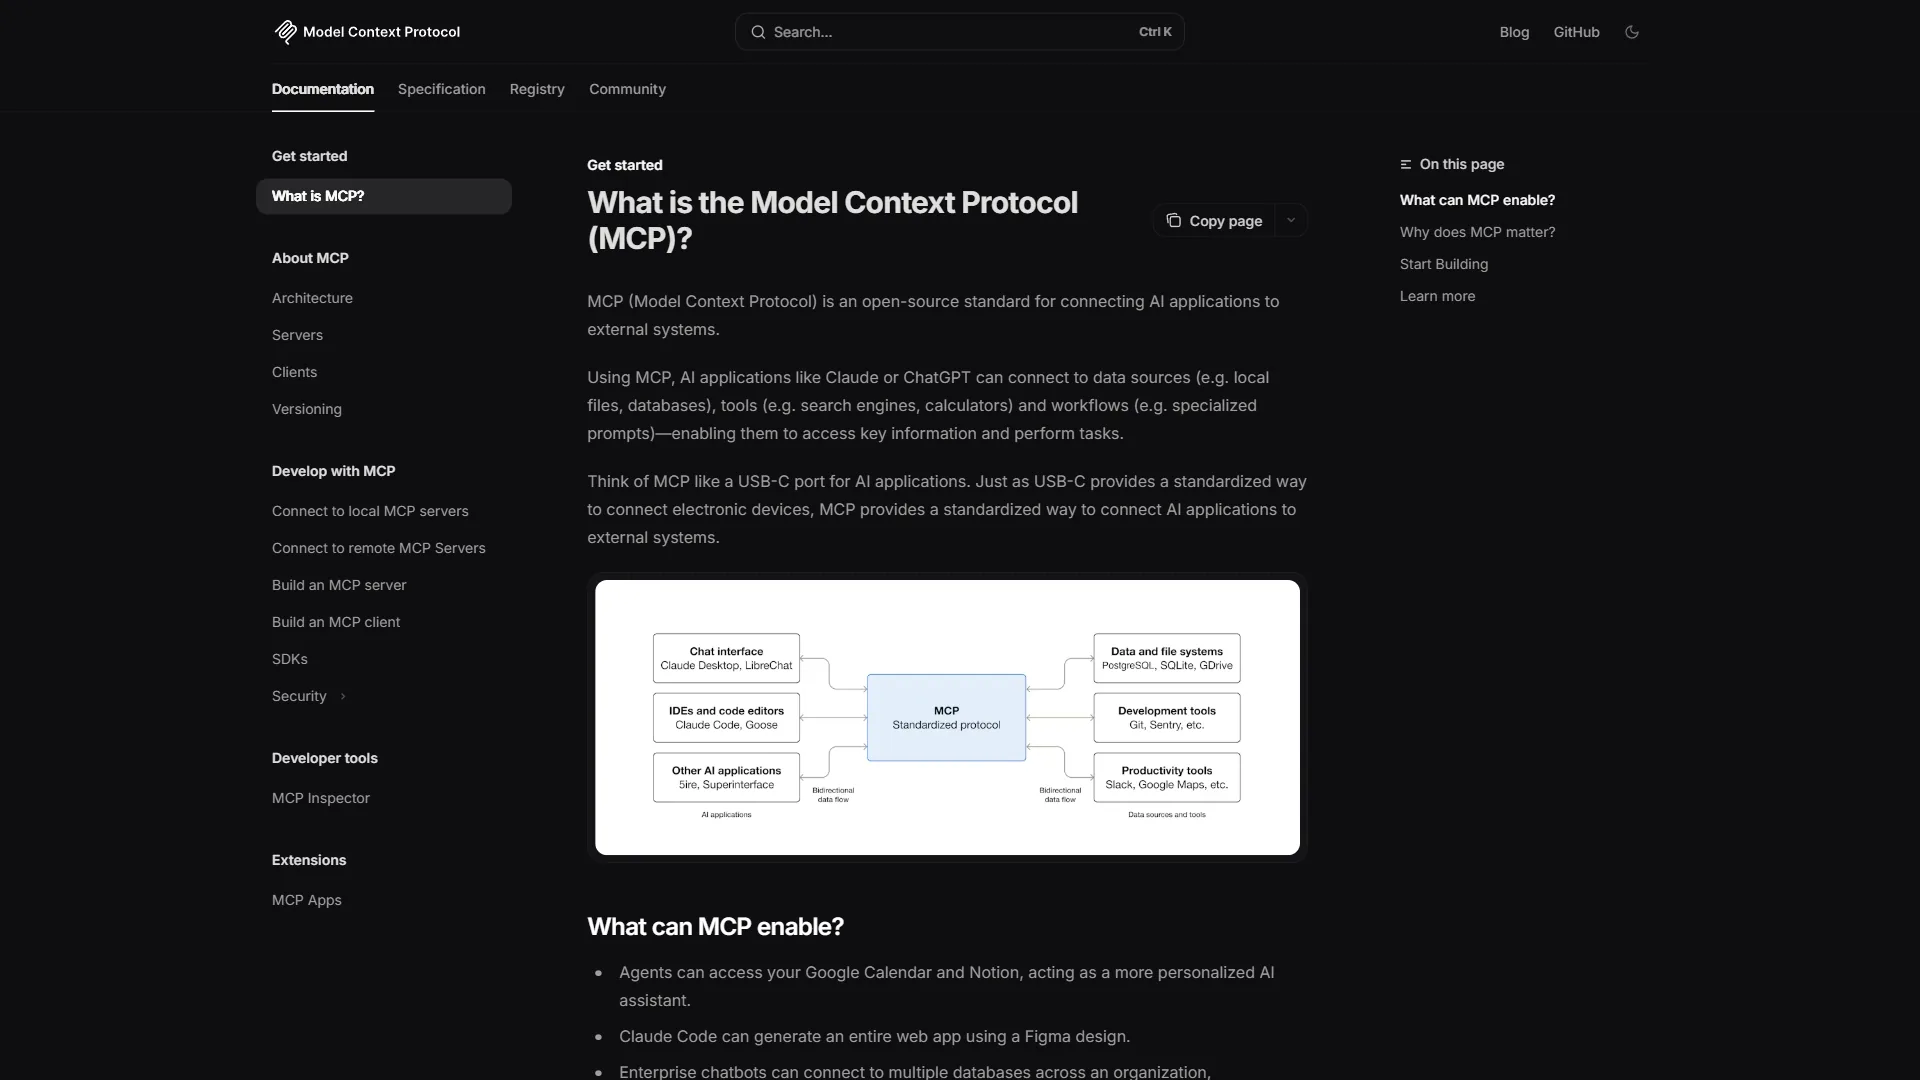
What is the Model Context Protocol?
MCP is an open protocol developed by Anthropic that standardizes how AI applications connect to external data sources and tools. Think of it as a universal adapter that lets AI assistants plug into any system you build.
Before MCP, integrating AI with external systems required custom implementations for each use case. MCP changes this by providing a standardized interface that any AI client can use to communicate with any MCP server.
Core MCP Concepts
Servers expose three types of capabilities to AI clients:
- Resources: Data the AI can read (files, database entries, API responses)
- Tools: Functions the AI can call to perform actions
- Prompts: Pre-built conversation templates for common tasks
Clients are AI applications (like Claude Desktop or Claude Code) that connect to MCP servers and use these capabilities.
Transports handle the communication layer. The two main options are:
- stdio: For local processes (most common for development)
- HTTP+SSE: For remote servers and production deployments
Prerequisites
Before we start building MCP servers, make sure you have:
For Python:
- Python 3.10 or higher
uvpackage manager (recommended) orpip- Basic understanding of async/await patterns
For TypeScript:
- Node.js 18 or higher
- npm or yarn
- Familiarity with TypeScript and async patterns
For testing:
- Claude Desktop or Claude Code installed
- Access to configure MCP servers in your Claude client
Building MCP Servers Guide: MCP Architecture Overview
Understanding the architecture helps you design better servers. Here’s how components interact:
┌─────────────────┐          ┌─────────────────┐
│   AI Client     │          │   MCP Server    │
│  (Claude Code)  │◄────────►│  (Your Code)    │
└─────────────────┘          └─────────────────┘
         │                           │
         │  MCP Protocol             │
         │  - list_resources         │  Resources (data)
         │  - read_resource          │  Tools (functions)
         │  - list_tools             │  Prompts (templates)
         │  - call_tool              │
         │  - list_prompts           │
         │  - get_prompt             │
         └───────────────────────────┘
The client initiates connections and makes requests. The server responds with capabilities and executes requested actions. All communication follows the MCP server documentation and specification, ensuring interoperability. Refer to the building MCP servers guide github repository for official SDKs and reference implementations as we continue and create some actual code.
Creating Your First MCP Server in Python
Let’s build a complete MCP server in Python. We’ll create a simple server that provides weather data and a tool to convert temperatures.
Step 1: Project Setup
Create a new directory and set up the project:
mkdir weather-mcp-server
cd weather-mcp-server

# Using uv (recommended)
uv init
uv add mcp

# Or using pip
python -m venv venv
source venv/bin/activate  # On Windows: venv\Scripts\activate
pip install mcp
Step 2: Basic Server Structure
Create server.py:
import asyncio
from mcp.server import Server
from mcp.server.stdio import stdio_server
from mcp.types import (
    Resource,
    Tool,
    TextContent,
    ImageContent,
    EmbeddedResource,
)

# Create the server instance
server = Server("weather-server")

# We'll add handlers here

async def main():
    """Run the server using stdio transport."""
    async with stdio_server() as (read_stream, write_stream):
        await server.run(
            read_stream,
            write_stream,
            server.create_initialization_options()
        )

if __name__ == "__main__":
    asyncio.run(main())
This creates a minimal server that starts up and waits for connections. Let’s add some functionality.
Step 3: Adding Resources
Resources expose data that the AI can read. Add this before the main() function:
# Sample weather data (in production, fetch from an API)
WEATHER_DATA = {
    "new-york": {
        "city": "New York",
        "temperature": 72,
        "unit": "fahrenheit",
        "conditions": "Partly cloudy",
        "humidity": 65,
        "wind_speed": 12
    },
    "london": {
        "city": "London",
        "temperature": 18,
        "unit": "celsius",
        "conditions": "Rainy",
        "humidity": 85,
        "wind_speed": 8
    },
    "tokyo": {
        "city": "Tokyo",
        "temperature": 28,
        "unit": "celsius",
        "conditions": "Sunny",
        "humidity": 55,
        "wind_speed": 5
    }
}

@server.list_resources()
async def list_resources() -> list[Resource]:
    """List all available weather resources."""
    resources = []
    for city_id, data in WEATHER_DATA.items():
        resources.append(
            Resource(
                uri=f"weather://{city_id}/current",
                name=f"Current weather in {data['city']}",
                description=f"Real-time weather data for {data['city']}",
                mimeType="application/json"
            )
        )
    return resources

@server.read_resource()
async def read_resource(uri: str) -> str:
    """Read a specific weather resource."""
    import json

    # Parse the URI to extract city
    if uri.startswith("weather://"):
        parts = uri.replace("weather://", "").split("/")
        city_id = parts[0]

        if city_id in WEATHER_DATA:
            return json.dumps(WEATHER_DATA[city_id], indent=2)

    raise ValueError(f"Unknown resource: {uri}")
Now the AI can list available cities and read their weather data.
Step 4: Adding Tools
Tools let the AI execute functions. Let’s add a temperature converter:
@server.list_tools()
async def list_tools() -> list[Tool]:
    """List available tools."""
    return [
        Tool(
            name="convert_temperature",
            description="Convert temperature between Celsius and Fahrenheit",
            inputSchema={
                "type": "object",
                "properties": {
                    "temperature": {
                        "type": "number",
                        "description": "The temperature value to convert"
                    },
                    "from_unit": {
                        "type": "string",
                        "enum": ["celsius", "fahrenheit"],
                        "description": "The unit to convert from"
                    },
                    "to_unit": {
                        "type": "string",
                        "enum": ["celsius", "fahrenheit"],
                        "description": "The unit to convert to"
                    }
                },
                "required": ["temperature", "from_unit", "to_unit"]
            }
        ),
        Tool(
            name="get_weather_summary",
            description="Get a formatted weather summary for a city",
            inputSchema={
                "type": "object",
                "properties": {
                    "city_id": {
                        "type": "string",
                        "description": "City identifier (e.g., 'new-york', 'london', 'tokyo')"
                    }
                },
                "required": ["city_id"]
            }
        )
    ]

@server.call_tool()
async def call_tool(name: str, arguments: dict) -> list[TextContent]:
    """Handle tool calls."""

    if name == "convert_temperature":
        temp = arguments["temperature"]
        from_unit = arguments["from_unit"]
        to_unit = arguments["to_unit"]

        if from_unit == to_unit:
            result = temp
        elif from_unit == "celsius" and to_unit == "fahrenheit":
            result = (temp * 9/5) + 32
        else:  # fahrenheit to celsius
            result = (temp - 32) * 5/9

        return [TextContent(
            type="text",
            text=f"{temp}° {from_unit.capitalize()} = {result:.1f}° {to_unit.capitalize()}"
        )]

    elif name == "get_weather_summary":
        city_id = arguments["city_id"]

        if city_id not in WEATHER_DATA:
            return [TextContent(
                type="text",
                text=f"Error: Unknown city '{city_id}'. Available: {', '.join(WEATHER_DATA.keys())}"
            )]

        data = WEATHER_DATA[city_id]
        summary = f"""
Weather Summary for {data['city']}
================================
Temperature: {data['temperature']}° {data['unit'].capitalize()}
Conditions: {data['conditions']}
Humidity: {data['humidity']}%
Wind Speed: {data['wind_speed']} mph
"""
        return [TextContent(type="text", text=summary.strip())]

    raise ValueError(f"Unknown tool: {name}")
Step 5: Adding Prompts
Prompts are pre-built conversation templates. They help users interact with your server more effectively:
from mcp.types import Prompt, PromptMessage, PromptArgument

@server.list_prompts()
async def list_prompts() -> list[Prompt]:
    """List available prompts."""
    return [
        Prompt(
            name="weather_report",
            description="Generate a comprehensive weather report for a city",
            arguments=[
                PromptArgument(
                    name="city",
                    description="The city to generate a report for",
                    required=True
                )
            ]
        )
    ]

@server.get_prompt()
async def get_prompt(name: str, arguments: dict | None) -> list[PromptMessage]:
    """Get a specific prompt."""
    if name == "weather_report":
        city = arguments.get("city", "new-york") if arguments else "new-york"
        return [
            PromptMessage(
                role="user",
                content=TextContent(
                    type="text",
                    text=f"Provide a detailed weather report for {city} using available resources."
                )
            )
        ]
    raise ValueError(f"Unknown prompt: {name}")
Combine all the code blocks from Steps 1-5 into a single server.py file. The complete server includes the data, resources, tools, and prompts handlers, with the main() function at the end.
Creating Your First MCP Server in TypeScript
Now that we’ve covered Python, this building MCP servers guide continues with TypeScript for those who prefer the JavaScript ecosystem.
Step 1: Project Setup
mkdir weather-mcp-server-ts
cd weather-mcp-server-ts

npm init -y
npm install @modelcontextprotocol/sdk
npm install -D typescript @types/node ts-node
npx tsc --init
Update tsconfig.json:
{
  "compilerOptions": {
    "target": "ES2022",
    "module": "NodeNext",
    "moduleResolution": "NodeNext",
    "strict": true,
    "esModuleInterop": true,
    "skipLibCheck": true,
    "outDir": "./dist"
  },
  "include": ["src/**/*"]
}
Step 2: Create the Server
Create src/index.ts:
import { Server } from "@modelcontextprotocol/sdk/server/index.js";
import { StdioServerTransport } from "@modelcontextprotocol/sdk/server/stdio.js";
import {
  ListResourcesRequestSchema,
  ReadResourceRequestSchema,
  ListToolsRequestSchema,
  CallToolRequestSchema,
  ListPromptsRequestSchema,
  GetPromptRequestSchema,
} from "@modelcontextprotocol/sdk/types.js";

interface WeatherData {
  city: string;
  temperature: number;
  unit: "celsius" | "fahrenheit";
  conditions: string;
  humidity: number;
  wind_speed: number;
}

const WEATHER_DATA: Record<string, WeatherData> = {
  "new-york": {
    city: "New York",
    temperature: 72,
    unit: "fahrenheit",
    conditions: "Partly cloudy",
    humidity: 65,
    wind_speed: 12,
  },
  london: {
    city: "London",
    temperature: 18,
    unit: "celsius",
    conditions: "Rainy",
    humidity: 85,
    wind_speed: 8,
  },
  tokyo: {
    city: "Tokyo",
    temperature: 28,
    unit: "celsius",
    conditions: "Sunny",
    humidity: 55,
    wind_speed: 5,
  },
};

const server = new Server(
  {
    name: "weather-server",
    version: "1.0.0",
  },
  {
    capabilities: {
      resources: {},
      tools: {},
      prompts: {},
    },
  }
);

// List Resources Handler
server.setRequestHandler(ListResourcesRequestSchema, async () => {
  return {
    resources: Object.entries(WEATHER_DATA).map(([cityId, data]) => ({
      uri: `weather://${cityId}/current`,
      name: `Current weather in ${data.city}`,
      description: `Real-time weather data for ${data.city}`,
      mimeType: "application/json",
    })),
  };
});

// Read Resource Handler
server.setRequestHandler(ReadResourceRequestSchema, async (request) => {
  const uri = request.params.uri;

  if (uri.startsWith("weather://")) {
    const cityId = uri.replace("weather://", "").split("/")[0];

    if (cityId in WEATHER_DATA) {
      return {
        contents: [
          {
            uri,
            mimeType: "application/json",
            text: JSON.stringify(WEATHER_DATA[cityId], null, 2),
          },
        ],
      };
    }
  }

  throw new Error(`Unknown resource: ${uri}`);
});

// List Tools Handler
server.setRequestHandler(ListToolsRequestSchema, async () => {
  return {
    tools: [
      {
        name: "convert_temperature",
        description: "Convert temperature between Celsius and Fahrenheit",
        inputSchema: {
          type: "object" as const,
          properties: {
            temperature: {
              type: "number",
              description: "The temperature value to convert",
            },
            from_unit: {
              type: "string",
              enum: ["celsius", "fahrenheit"],
              description: "The unit to convert from",
            },
            to_unit: {
              type: "string",
              enum: ["celsius", "fahrenheit"],
              description: "The unit to convert to",
            },
          },
          required: ["temperature", "from_unit", "to_unit"],
        },
      },
      {
        name: "get_weather_summary",
        description: "Get a formatted weather summary for a city",
        inputSchema: {
          type: "object" as const,
          properties: {
            city_id: {
              type: "string",
              description: "City identifier",
            },
          },
          required: ["city_id"],
        },
      },
    ],
  };
});

// Call Tool Handler
server.setRequestHandler(CallToolRequestSchema, async (request) => {
  const { name, arguments: args } = request.params;

  if (name === "convert_temperature") {
    const temp = args?.temperature as number;
    const fromUnit = args?.from_unit as string;
    const toUnit = args?.to_unit as string;

    let result: number;
    if (fromUnit === toUnit) {
      result = temp;
    } else if (fromUnit === "celsius") {
      result = (temp * 9) / 5 + 32;
    } else {
      result = ((temp - 32) * 5) / 9;
    }

    return {
      content: [
        {
          type: "text" as const,
          text: `${temp}° ${fromUnit} = ${result.toFixed(1)}° ${toUnit}`,
        },
      ],
    };
  }

  if (name === "get_weather_summary") {
    const cityId = args?.city_id as string;

    if (!(cityId in WEATHER_DATA)) {
      return {
        content: [
          {
            type: "text" as const,
            text: `Unknown city: ${cityId}. Available: ${Object.keys(WEATHER_DATA).join(", ")}`,
          },
        ],
      };
    }

    const data = WEATHER_DATA[cityId];
    const summary = `Weather in ${data.city}: ${data.temperature}° ${data.unit}, ${data.conditions}, Humidity: ${data.humidity}%`;

    return {
      content: [
        {
          type: "text" as const,
          text: summary,
        },
      ],
    };
  }

  throw new Error(`Unknown tool: ${name}`);
});

// List Prompts Handler
server.setRequestHandler(ListPromptsRequestSchema, async () => {
  return {
    prompts: [
      {
        name: "weather_report",
        description: "Generate a comprehensive weather report for a city",
        arguments: [
          {
            name: "city",
            description: "The city to generate a report for",
            required: true,
          },
        ],
      },
    ],
  };
});

// Get Prompt Handler
server.setRequestHandler(GetPromptRequestSchema, async (request) => {
  const { name, arguments: args } = request.params;

  if (name === "weather_report") {
    const city = args?.city || "new-york";
    return {
      messages: [
        {
          role: "user" as const,
          content: {
            type: "text" as const,
            text: `Please provide a detailed weather report for ${city} using the available weather resources and tools.`,
          },
        },
      ],
    };
  }

  throw new Error(`Unknown prompt: ${name}`);
});

// Start the server
async function main() {
  const transport = new StdioServerTransport();
  await server.connect(transport);
  console.error("Weather MCP Server running on stdio");
}

main().catch(console.error);
Build and Run
Add scripts to package.json:
{
  "scripts": {
    "build": "tsc",
    "start": "node dist/index.js"
  }
}
Build and test:
npm run build
npm start
How Do You Test Your MCP Server?
Configuring Claude Desktop
Add your server to Claude Desktop’s configuration file:
macOS: ~/Library/Application Support/Claude/claude_desktop_config.json
Windows: %APPDATA%\Claude\claude_desktop_config.json
{
  "mcpServers": {
    "weather": {
      "command": "python",
      "args": ["/absolute/path/to/server.py"]
    }
  }
}
For TypeScript:
{
  "mcpServers": {
    "weather": {
      "command": "node",
      "args": ["/absolute/path/to/dist/index.js"]
    }
  }
}
Restart Claude Desktop, and you should see your server’s tools and resources available.
Configuring Claude Code
For Claude Code, add to your project’s .claude/settings.json:
{
  "mcpServers": {
    "weather": {
      "command": "python",
      "args": ["./weather-mcp-server/server.py"]
    }
  }
}
Testing Individual Components
You can test your server manually using the MCP inspector tool:
npx @modelcontextprotocol/inspector python server.pyThis opens a web interface where you can test resources, tools, and prompts interactively.
Building a Real-World MCP Server: Database Integration
Let’s build a more practical example that connects to a SQLite database:
import asyncio
import sqlite3
import json
from pathlib import Path
from mcp.server import Server
from mcp.server.stdio import stdio_server
from mcp.types import Resource, Tool, TextContent

server = Server("database-server")

DB_PATH = Path("./data.db")

def get_connection():
    return sqlite3.connect(DB_PATH)

def init_database():
    """Initialize sample database."""
    conn = get_connection()
    cursor = conn.cursor()

    cursor.execute("""
        CREATE TABLE IF NOT EXISTS products (
            id INTEGER PRIMARY KEY,
            name TEXT NOT NULL,
            price REAL NOT NULL,
            category TEXT,
            stock INTEGER DEFAULT 0
        )
    """)

    # Insert sample data
    cursor.execute("SELECT COUNT(*) FROM products")
    if cursor.fetchone()[0] == 0:
        products = [
            ("Widget A", 29.99, "Electronics", 150),
            ("Widget B", 49.99, "Electronics", 75),
            ("Gadget X", 199.99, "Electronics", 30),
            ("Tool Y", 79.99, "Tools", 100),
            ("Supply Z", 9.99, "Supplies", 500),
        ]
        cursor.executemany(
            "INSERT INTO products (name, price, category, stock) VALUES (?, ?, ?, ?)",
            products
        )

    conn.commit()
    conn.close()

@server.list_resources()
async def list_resources() -> list[Resource]:
    conn = get_connection()
    cursor = conn.cursor()
    cursor.execute("SELECT DISTINCT category FROM products")
    categories = cursor.fetchall()
    conn.close()

    resources = [
        Resource(
            uri="db://products/all",
            name="All Products",
            description="Complete product catalog",
            mimeType="application/json"
        )
    ]

    for (category,) in categories:
        resources.append(Resource(
            uri=f"db://products/category/{category.lower()}",
            name=f"{category} Products",
            description=f"Products in the {category} category",
            mimeType="application/json"
        ))

    return resources

@server.read_resource()
async def read_resource(uri: str) -> str:
    conn = get_connection()
    cursor = conn.cursor()

    if uri == "db://products/all":
        cursor.execute("SELECT * FROM products")
    elif uri.startswith("db://products/category/"):
        category = uri.split("/")[-1]
        cursor.execute(
            "SELECT * FROM products WHERE LOWER(category) = ?",
            (category,)
        )
    else:
        conn.close()
        raise ValueError(f"Unknown resource: {uri}")

    columns = [desc[0] for desc in cursor.description]
    rows = [dict(zip(columns, row)) for row in cursor.fetchall()]
    conn.close()

    return json.dumps(rows, indent=2)

@server.list_tools()
async def list_tools() -> list[Tool]:
    return [
        Tool(
            name="query_products",
            description="Search products with filters",
            inputSchema={
                "type": "object",
                "properties": {
                    "min_price": {"type": "number", "description": "Minimum price"},
                    "max_price": {"type": "number", "description": "Maximum price"},
                    "category": {"type": "string", "description": "Category filter"},
                    "in_stock": {"type": "boolean", "description": "Only show in-stock items"}
                }
            }
        ),
        Tool(
            name="update_stock",
            description="Update product stock level",
            inputSchema={
                "type": "object",
                "properties": {
                    "product_id": {"type": "integer", "description": "Product ID"},
                    "new_stock": {"type": "integer", "description": "New stock level"}
                },
                "required": ["product_id", "new_stock"]
            }
        ),
        Tool(
            name="add_product",
            description="Add a new product to the catalog",
            inputSchema={
                "type": "object",
                "properties": {
                    "name": {"type": "string"},
                    "price": {"type": "number"},
                    "category": {"type": "string"},
                    "stock": {"type": "integer"}
                },
                "required": ["name", "price", "category"]
            }
        )
    ]

@server.call_tool()
async def call_tool(name: str, arguments: dict) -> list[TextContent]:
    conn = get_connection()
    cursor = conn.cursor()

    try:
        if name == "query_products":
            conditions = []
            params = []

            if "min_price" in arguments:
                conditions.append("price >= ?")
                params.append(arguments["min_price"])
            if "max_price" in arguments:
                conditions.append("price <= ?")
                params.append(arguments["max_price"])
            if "category" in arguments:
                conditions.append("LOWER(category) = ?")
                params.append(arguments["category"].lower())
            if arguments.get("in_stock"):
                conditions.append("stock > 0")

            query = "SELECT * FROM products"
            if conditions:
                query += " WHERE " + " AND ".join(conditions)

            cursor.execute(query, params)
            columns = [desc[0] for desc in cursor.description]
            rows = [dict(zip(columns, row)) for row in cursor.fetchall()]

            return [TextContent(
                type="text",
                text=f"Found {len(rows)} products:\n{json.dumps(rows, indent=2)}"
            )]

        elif name == "update_stock":
            cursor.execute(
                "UPDATE products SET stock = ? WHERE id = ?",
                (arguments["new_stock"], arguments["product_id"])
            )
            conn.commit()

            if cursor.rowcount == 0:
                return [TextContent(type="text", text="Product not found")]

            return [TextContent(
                type="text",
                text=f"Updated stock for product {arguments['product_id']} to {arguments['new_stock']}"
            )]

        elif name == "add_product":
            cursor.execute(
                "INSERT INTO products (name, price, category, stock) VALUES (?, ?, ?, ?)",
                (
                    arguments["name"],
                    arguments["price"],
                    arguments["category"],
                    arguments.get("stock", 0)
                )
            )
            conn.commit()

            return [TextContent(
                type="text",
                text=f"Added product '{arguments['name']}' with ID {cursor.lastrowid}"
            )]

        raise ValueError(f"Unknown tool: {name}")

    finally:
        conn.close()

async def main():
    init_database()
    async with stdio_server() as (read_stream, write_stream):
        await server.run(
            read_stream,
            write_stream,
            server.create_initialization_options()
        )

if __name__ == "__main__":
    asyncio.run(main())
How Do You Deploy an MCP Server?
Local Development
For local development, stdio transport works well. The server runs as a subprocess managed by the AI client.
Docker Deployment
Create a Dockerfile:
FROM python:3.11-slim

WORKDIR /app
COPY requirements.txt .
RUN pip install --no-cache-dir -r requirements.txt

COPY server.py .
CMD ["python", "server.py"]
With requirements.txt:
mcp>=0.9.0HTTP+SSE Transport (Remote Servers)
For remote deployment, use HTTP+SSE transport:
from mcp.server.sse import SseServerTransport
from starlette.applications import Starlette
from starlette.routing import Route

sse = SseServerTransport("/messages")

async def handle_sse(request):
    async with sse.connect_sse(
        request.scope, request.receive, request._send
    ) as streams:
        await server.run(
            streams[0], streams[1],
            server.create_initialization_options()
        )

async def handle_messages(request):
    await sse.handle_post_message(request.scope, request.receive, request._send)

app = Starlette(
    routes=[
        Route("/sse", handle_sse),
        Route("/messages", handle_messages, methods=["POST"]),
    ]
)
Run with:
uvicorn server:app --host 0.0.0.0 --port 8000Best Practices for Production MCP Servers
Error Handling
Always return meaningful error messages:
@server.call_tool()
async def call_tool(name: str, arguments: dict) -> list[TextContent]:
    try:
        # Tool implementation
        pass
    except ValueError as e:
        return [TextContent(type="text", text=f"Validation error: {e}")]
    except ConnectionError as e:
        return [TextContent(type="text", text=f"Connection failed: {e}")]
    except Exception as e:
        # Log the full error for debugging
        import traceback
        traceback.print_exc()
        return [TextContent(type="text", text=f"Internal error: {type(e).__name__}")]
Input Validation
Validate all inputs before processing:
def validate_arguments(arguments: dict, required: list[str]) -> None:
    missing = [key for key in required if key not in arguments]
    if missing:
        raise ValueError(f"Missing required arguments: {', '.join(missing)}")
Logging
Add comprehensive logging:
import logging

logging.basicConfig(
    level=logging.INFO,
    format='%(asctime)s - %(name)s - %(levelname)s - %(message)s',
    handlers=[logging.StreamHandler()]
)
logger = logging.getLogger("mcp-server")

@server.call_tool()
async def call_tool(name: str, arguments: dict) -> list[TextContent]:
    logger.info(f"Tool called: {name} with args: {arguments}")
    # Implementation
    logger.info(f"Tool {name} completed successfully")
Security Considerations
- Validate all inputs: Never trust data from the client
- Limit resource access: Only expose necessary data
- Use parameterized queries: Prevent SQL injection
- Implement rate limiting: For HTTP deployments
- Authenticate requests: For sensitive operations
# Example: Parameterized query (safe)
cursor.execute("SELECT * FROM users WHERE id = ?", (user_id,))

# Never do this (SQL injection risk)
# cursor.execute(f"SELECT * FROM users WHERE id = {user_id}")
Resource Management
Clean up resources properly:
from contextlib import asynccontextmanager

@asynccontextmanager
async def get_db_connection():
    conn = sqlite3.connect(DB_PATH)
    try:
        yield conn
    finally:
        conn.close()

@server.call_tool()
async def call_tool(name: str, arguments: dict) -> list[TextContent]:
    async with get_db_connection() as conn:
        # Use connection
        pass
Conclusion
Building MCP servers opens up powerful integration possibilities between AI assistants and your systems. Whether you’re connecting to databases, APIs, or custom tools, MCP provides a standardized way to extend AI capabilities.
The key takeaways from this building MCP servers guide:
- Start simple: Begin with basic resources and tools, then add complexity
- Use the official SDKs: Both Python and TypeScript have well-maintained libraries
- Test thoroughly: Use the MCP inspector and Claude clients to validate behavior
- Follow best practices: Error handling, logging, and security are essential for production
- Choose the right transport: stdio for local development, HTTP+SSE for remote deployments
The MCP ecosystem is growing rapidly, with new servers and tools being developed daily. By mastering the fundamentals of building MCP servers, you’re well-equipped to create integrations that make AI assistants genuinely useful for your specific workflows. For a broader look at the coding tools landscape, see our best AI coding assistants comparison.
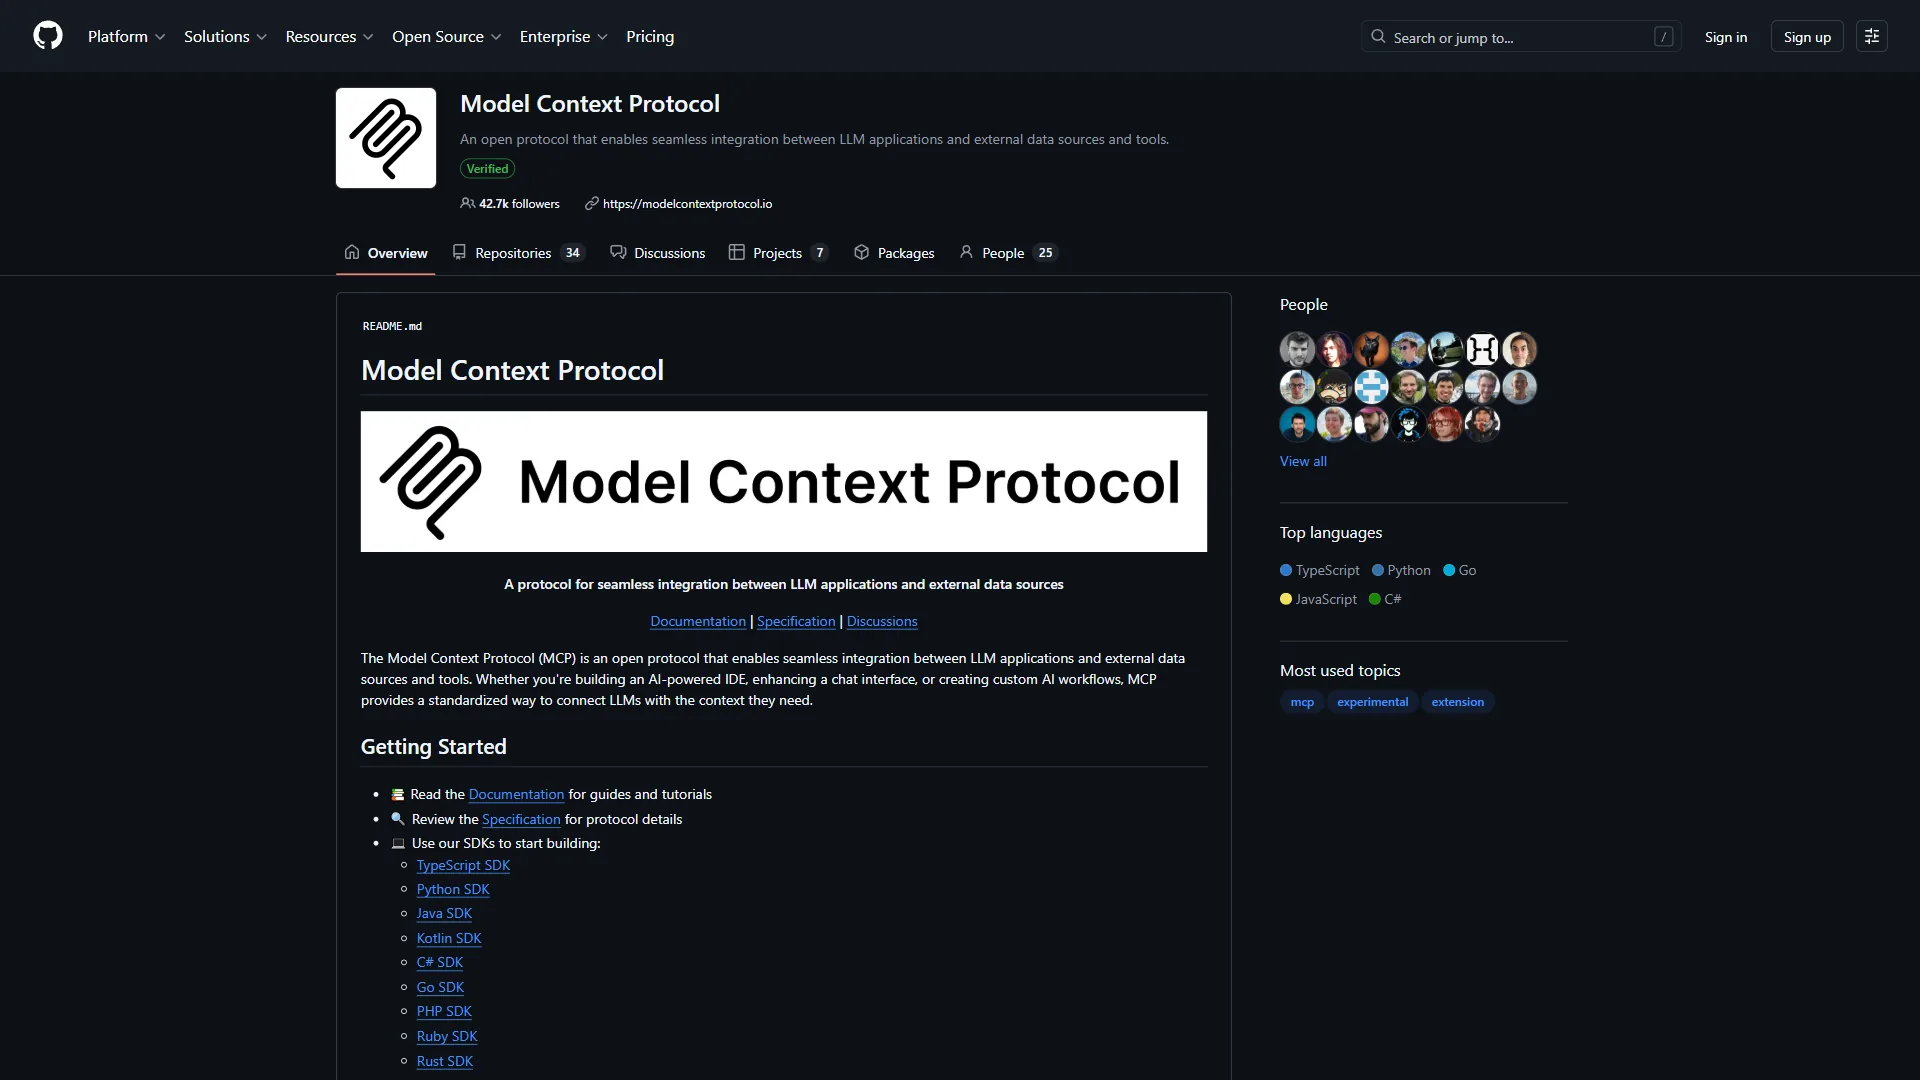
For more information and examples, visit the official MCP documentation and explore the GitHub organization for reference implementations.
Frequently Asked Questions
What is MCP and why does it matter for AI?
MCP (Model Context Protocol) is an open protocol developed by Anthropic that standardizes how AI applications connect to external data sources and tools. Think of it as a universal adapter - before MCP, integrating AI with external systems required custom implementations for each use case. MCP replaces that with a single standardized interface any AI client can use.
What programming languages can you use to build MCP servers?
You can build MCP servers in both Python and TypeScript. The Python path requires Python 3.10 or higher and the uv package manager (or pip), along with a basic understanding of async/await patterns. TypeScript is the alternative for developers who prefer the JavaScript ecosystem.
What transport options are available for MCP servers?
There are two main transport options: stdio, which handles local processes and is most common for development, and HTTP+SSE, which is used for remote servers and production deployments.
Which AI clients can connect to MCP servers?
AI applications like Claude Desktop and Claude Code act as MCP clients, connecting to MCP servers to access external capabilities. The standardized protocol ensures interoperability - any compliant AI client can communicate with any MCP server you build.
What can you actually do with a custom MCP server?
MCP servers let AI assistants query internal documentation, access your APIs, interact with custom tools, and connect to databases. The protocol provides a standardized way to extend AI capabilities for your specific workflows, making assistants like Claude genuinely useful beyond their pre-trained knowledge.
Want to learn more about Claude Code?
Related Guides
- Claude Code Tips and Tricks - Power-user shortcuts for Claude Code
- MCP Server Development Patterns - Advanced MCP architecture patterns
- Claude Code Skills Tutorial - Build reusable skills for Claude Code
Related Reads
Tools covered in this article:
- Claude Code - AI coding assistant with MCP support
More developer guides:
- MCP Server Development Patterns - Advanced MCP patterns
- AI Coding Skills Tutorial - Building AI coding skills
- AI Code Hooks Deep Dive - Hooks and automation
External Resources
For official documentation and updates:
- Model Context Protocol - Official documentation
- MCP GitHub - Reference implementations
Related Guides
- AI Agent Orchestration: Patterns That Scale in 2026
- AI Productivity Trends 2026: 6 Real Shifts, No Hype
- AI Workflow Automation Maturity Model: 5 Levels
- Building AI First Workflows: A Practitioner's 2026 Guide
- ChatGPT Custom GPTs Guide - Save 130+ Hours a Year
- ChatGPT Prompts 2026: Basic vs Engineered, 18 Examples
- ChatGPT Tips And Tricks: 2026 Walkthrough for Teams
- Claude Code Hooks Guide: PreToolUse, PostToolUse, Stop
- Claude Code Simplifier Pre-commit Hook: Complete 2026 Guide
- Claude Code Skills Tutorial: 2026 Walkthrough for Teams