Tidio visitor tracking turns your website from a static storefront into a live intelligence feed. Every visitor who lands on your site generates data - which pages they browse, how long they stay, whether they have visited before, and what device they are using. Without tracking, that data evaporates the moment they leave. With Tidio visitor tracking enabled, you can watch browsing behavior in real time, identify visitors who show buying intent, and trigger automated conversations before they bounce. For small businesses and ecommerce sellers who cannot afford to let warm leads slip away, this turns passive traffic into active pipeline.
This guide walks through the complete Tidio visitor tracking and lead generation setup - from accessing the visitors list and understanding the data it surfaces, to configuring proactive chat triggers, building lead capture flows, and segmenting contacts for targeted follow-up. By the end, you will have a system that identifies your highest-value visitors and engages them automatically.
How Visitor Tracking Works
Tidio visitor tracking operates through the same chat widget code snippet you install on your website. Once the widget is active, it monitors visitor sessions and reports behavioral data back to your Tidio dashboard in real time.
Session tracking. When someone loads a page with the Tidio widget, a session begins. Tidio records the visitor’s current page, referral source, geographic location (based on IP), browser type, operating system, and device category (desktop, mobile, or tablet). As the visitor navigates between pages, each page view is logged with a timestamp, building a chronological map of their browsing path. The Tidio visitor tracking app surfaces a live Tidio visitor tracking number in your dashboard so you can see exactly how many sessions are active at any given moment.
Returning visitor recognition. Tidio uses browser cookies to identify returning visitors. If someone visited your site last week and comes back today, Tidio links the two sessions together so you can see their complete history - not just the current visit. This is critical for lead generation because returning visitors convert at significantly higher rates than first-time visitors. Tools like Leadfeeder and Similarweb can supplement this with company-level identification, but Tidio handles the real-time engagement side. A visitor who keeps coming back to your pricing page is telling you something.
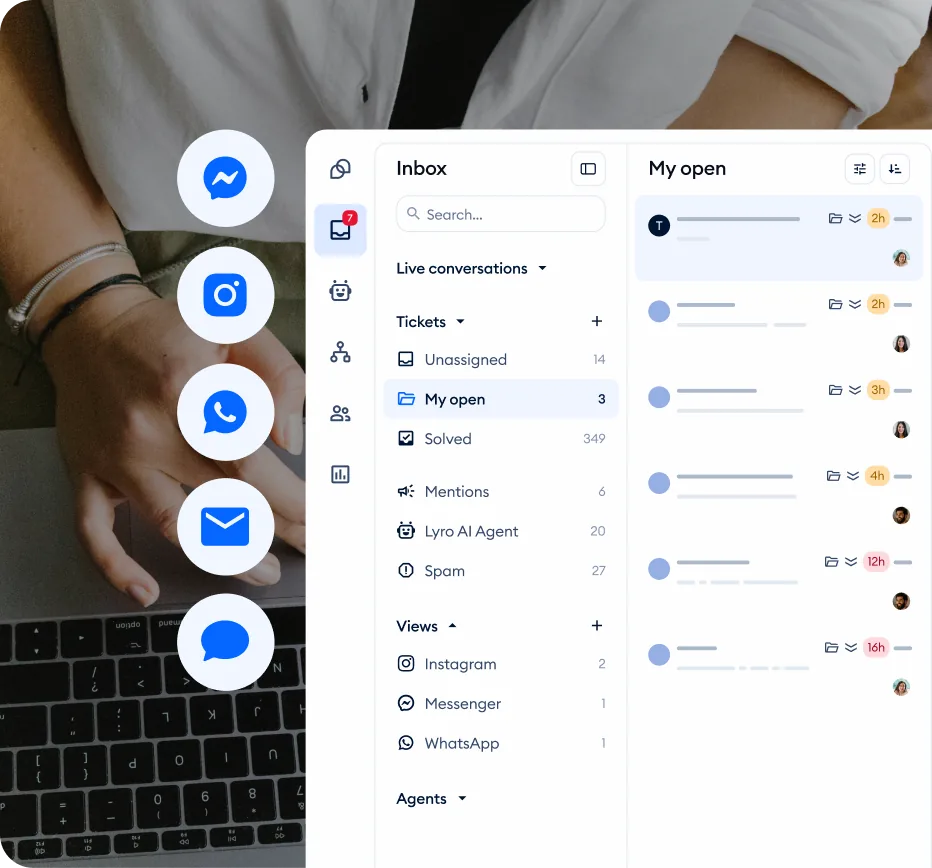
Real-time presence. The visitors list in your Tidio dashboard updates in real time, showing you who is on your site right now, what page they are viewing, and how long they have been browsing. Unlike Google Analytics, which reports traffic in aggregated sessions after the fact, this live feed is what makes proactive engagement possible - you can see a visitor lingering on a product page and start a conversation before they navigate away.
Contact enrichment. When a visitor provides their email address - through a pre-chat form, a lead capture flow, or a live conversation - Tidio merges their browsing history with their contact record. From that point forward, every return visit is attributed to a known contact rather than an anonymous session. Your sales team can see exactly which pages a lead visited before and after filling out a form.
Prerequisites
Before setting up visitor tracking and lead capture, make sure you have the following in place.
Tidio account with the widget installed. Visitor tracking requires the Tidio chat widget to be active on your website. If you have not completed the initial setup, start with the Getting Started with Tidio guide. The widget must be installed on every page where you want to track visitor behavior - a single-page installation only tracks that one page.
A paid plan for full tracking features. Basic visitor data is available on all plans, but the complete visitors list with real-time monitoring, detailed session data, and proactive chat triggers requires a paid plan. The Growth plan and above provide the most comprehensive tracking capabilities. Check the Tidio pricing page for current feature availability by tier, and the Tidio AI agent page if Lyro will run alongside your visitor tracking. ActiveCampaign users can also reference the ActiveCampaign pricing page when planning the downstream nurture stack.
Clear lead qualification criteria. Before building automated engagement, define what makes a visitor worth engaging. Which pages indicate buying intent on your site? How many page views suggest serious interest? What information do you need to capture to qualify a lead? Having these answers before you configure triggers prevents you from either overwhelming visitors with chat prompts or missing genuine opportunities.
At least one team member available to handle live conversations. Proactive chat triggers generate conversations. If no one is available to respond when a visitor replies, the experience is worse than not reaching out at all. Set up your team and routing rules before enabling proactive triggers, or configure triggers to fire only during business hours.
Access the Visitors List
The visitors list is your live command center for understanding who is on your site and what they are doing.
Step 1: Open the Contacts section. In your Tidio dashboard, navigate to Contacts in the left sidebar. This section manages all your visitor and contact data.
Step 2: Switch to the Live Visitors view. Within the Contacts area, look for the live visitors or online visitors filter. This view shows only visitors who are currently active on your website, updated in real time. Each entry displays the visitor’s current page, location, browser, and session duration.
Step 3: Review the visitor cards. Each visitor appears as a card or row with key data points visible at a glance. You will see their current page URL, the number of pages they have viewed in this session, their geographic location (city and country), the device and browser they are using, and whether they are a new or returning visitor. Returning visitors are particularly valuable - they have already shown enough interest to come back.
Step 4: Click into individual visitor profiles. Clicking on a visitor opens their full profile, which includes their complete browsing history across all sessions, any contact information they have provided, conversation history with your team or Lyro AI, and any tags or notes your team has added. This profile view is where anonymous traffic becomes actionable intelligence.
Step 5: Start a manual conversation. From any visitor’s profile or card, you can initiate a chat directly. This sends a message to the visitor’s chat widget, opening a conversation as if you had walked up to them in a physical store. Use this for high-value visitors who match your ideal customer profile - a visitor browsing your enterprise pricing page for the third time this week is worth a personal hello.
What Does Visitor Tracking Data Tell You?
Raw data is only useful if you know what to look for. Here is how to interpret the key data points Tidio provides for each visitor.
Current page and page history. The page a visitor is currently viewing tells you their immediate intent. Someone on your homepage is browsing. Someone on a specific product page is evaluating. Someone on your pricing page is comparing options. Someone on your checkout page is ready to buy. The page history shows the path they took to get there - a visitor who went from a blog post to a product page to the pricing page is following a classic buying journey.
Session duration and page count. Longer sessions with more page views generally indicate higher engagement. A visitor who has spent eight minutes viewing six pages is far more engaged than someone who bounced after 15 seconds on one page. However, context matters - a long session on your support documentation might indicate frustration rather than buying intent.
New versus returning status. First-time visitors are exploring. Returning visitors are evaluating. A visitor who returns three or more times has moved past casual interest into active consideration. Tidio flags returning visitors automatically, and you can set up different engagement strategies for each group.
Geographic location. Location data helps you personalize conversations and qualify leads. If you only serve certain regions, you can filter out visitors from areas you do not cover. If you have region-specific pricing or shipping options, you can tailor your proactive messages accordingly. (Geo-IP accuracy varies by country - the MaxMind GeoIP2 database documents the typical confidence intervals.)
Referral source. Understanding where a visitor came from - organic search, paid advertising, social media, or a direct link - helps you assess intent. Visitors from paid search campaigns often have higher intent because they actively searched for a solution. Visitors from social media may be earlier in the research phase. Tailor your engagement approach to match (the UTM parameter standard is what most attribution stacks use to capture this).
Device and browser. While less directly tied to purchase intent, device data helps with troubleshooting and personalization. Mobile visitors may need different engagement timing since they browse in shorter sessions. Desktop visitors on your site during business hours are often researching for work - potentially higher-value B2B leads.
How Do You Set Up Proactive Chat Triggers?
Proactive chat is the difference between waiting for visitors to ask for help and reaching out to them at exactly the right moment. Instead of hoping visitors click your chat widget, you trigger a conversation based on their behavior.
Page-Based Triggers
The most effective proactive triggers fire based on which page a visitor is viewing.
Pricing page trigger. Create a Flow that triggers when a visitor views your pricing page. After a 10-15 second delay (long enough for them to read the page but short enough to catch them before they leave), send a message like: “Hi! I see you are looking at our plans. Want help choosing the right one for your needs?” This single trigger can significantly increase your pricing page conversion rate because many visitors leave pricing pages with unanswered questions they were not going to ask on their own. CXL’s CRO resources have data on which timing windows convert best.
Product page trigger. For ecommerce stores, trigger a message when a visitor views a specific product or product category page for more than 20 seconds. Keep it relevant: “Looking for more details on [product category]? I can help you find the right fit.” Avoid triggering on every product page view - limit it to high-value products or categories where personalized assistance drives conversions.
Checkout page trigger. If a visitor is on your checkout page for more than 30 seconds without completing the purchase, something might be holding them back. A well-timed message offering help - “Need any help completing your order? I can answer questions about shipping or payment options.” - can recover sales that would otherwise be lost.
Behavior-Based Triggers
Beyond page views, visitor behavior patterns can signal the right moment to engage.
Return visit trigger. When a recognized visitor returns to your site, trigger a personalized welcome message. Reference their previous visit if possible: “Welcome back! Last time you were checking out our [product/service]. Can I answer any questions?” This level of personalization shows visitors that you are paying attention without being intrusive.
High page count trigger. A visitor who has viewed five or more pages in a single session is actively researching. After the fifth page view, trigger a message offering assistance: “You have been exploring our site - can I help you find what you are looking for?” This catches engaged visitors who might not have thought to use the chat widget.
Time-on-site trigger. Visitors who have spent more than three minutes on your site are engaged but might not have found what they need. A gentle check-in after a defined time threshold can convert browsers into conversations - the Nielsen Norman Group’s research on engagement time backs the three-minute heuristic.
Trigger Best Practices
Do not stack triggers. If a visitor qualifies for multiple triggers, make sure only one fires. Tidio allows you to set priority rules so visitors are not bombarded with messages on every page they visit.
Respect dismissals. If a visitor closes a proactive message, do not send another one during the same session. One proactive touch per session is the right balance between helpful and annoying.
Test timing carefully. A message that fires after 3 seconds feels intrusive. A message that fires after 60 seconds misses most visitors. Start with 10-15 seconds for high-intent pages (pricing, checkout) and 20-30 seconds for general browsing pages. Adjust based on your bounce rate data from GA4’s engagement metrics.
How Do You Build Lead Capture Flows in Tidio?
Proactive triggers get the conversation started. Lead capture flows collect the information your sales team needs to follow up.
Basic Email Capture Flow
The simplest lead capture flow collects an email address in exchange for value - a discount code, a free resource, or just the promise of a follow-up.
Step 1: Create a new Flow. Navigate to Flows in the left sidebar and click Build from scratch or choose a lead capture template. Name it something descriptive like “Lead Capture - Pricing Page Visitors.”
Step 2: Set the trigger. Choose Visitor opens a specific page and enter your pricing page URL. Add a delay of 10-15 seconds so the visitor has time to absorb the page content before the chat appears.
Step 3: Send the opening message. Use a message that offers clear value: “Hi! Want me to send you a personalized comparison of our plans based on your needs? Just drop your email and I will follow up with recommendations.”
Step 4: Collect the email. Add an Ask a question node configured to collect an email address. Tidio validates email format automatically (using RFC 5322-style syntax checks), so visitors cannot submit invalid addresses. Store the response in a variable.
Step 5: Ask a qualifying question. After capturing the email, ask one qualifying question to help your sales team prioritize the lead. Something like: “How many team members would be using the tool?” with quick-reply buttons for “Just me,” “2-5,” “6-20,” and “20+.” This takes five seconds for the visitor and gives your team immediate context.
Step 6: Confirm and close. Thank the visitor, set expectations (“I will send you a comparison within 24 hours”), and offer to connect them with a team member if they want to chat now. Tag the contact with “pricing-lead” so your sales workflow can pick them up.
Multi-Step Qualification Flow
For higher-value products or services, collect more information through a conversational sequence.
Build a flow that asks three to four qualifying questions in sequence: company size, current solution, primary challenge, and budget range. Use quick-reply buttons for each question so the visitor clicks rather than types - this dramatically increases completion rates. Each response is stored as a contact property and the complete profile is available to your sales team when they follow up.
The key to multi-step flows is brevity. Each question should take under five seconds to answer. If visitors feel like they are filling out a long form, they abandon. If it feels like a conversation, they complete it.
Exit-Intent Lead Capture
Trigger a lead capture flow when a visitor shows signs of leaving - moving their mouse toward the browser’s close button or navigating away from a key page. This is your last chance to convert a visitor who was interested enough to browse but not quite ready to buy.
The exit-intent message should be concise and offer immediate value: “Before you go - want us to email you a summary of what you were looking at?” Collect just the email address. One field. No qualifying questions. The goal is speed - capture the contact before they leave, and qualify them in the follow-up email.
How Do You Segment Visitors in Tidio?
Not all visitors are equal. Segmentation lets you organize contacts based on their behavior, intent level, and qualification status so your team can prioritize effectively.
Automatic Tagging
Use your lead capture flows to tag contacts automatically based on their responses and behavior. Common tagging strategies include:
| Plan | Details |
|---|---|
| Intent level | Tag visitors as “high-intent” if they viewed the pricing page, “medium-intent” if they browsed multiple product pages, or “low-intent” if they only viewed blog content |
| Source | Tag by referral source - “paid-search-lead,” “organic-lead,” or “social-lead” - so you can measure which channels generate the best leads |
| Product interest | Tag based on which product pages the visitor browsed - “interested-plan-a,” “interested-enterprise” - so sales outreach references the right offering |
| Qualification tier | Based on qualifying question responses, tag as “qualified-lead,” “needs-nurturing,” or “not-a-fit” |
Contact Properties
Beyond tags, Tidio contact properties store structured data that you can filter and search against. Set custom properties for company size, industry, budget range, and any other qualification criteria your sales team uses. Properties are more searchable and filterable than tags for structured data, while tags work better for flexible categorization.
Segment-Based Engagement
Once your contacts are segmented, create different follow-up strategies for each segment.
High-intent visitors get immediate personal outreach from your sales team. These are visitors who viewed pricing, returned multiple times, or completed a qualification flow with high-value responses.
Medium-intent visitors get automated nurture sequences. Connect Tidio with your email marketing platform to trigger drip campaigns based on tags and properties.
Low-intent visitors get value-first engagement. Blog readers and casual browsers are not ready for a sales pitch. Offer helpful content, invite them to webinars, or suggest relevant resources. Build trust first, sell later.
Tidio Visitor Tracking: Integration with Analytics
Tidio visitor tracking data becomes more powerful when combined with your existing analytics tools.
Tidio Analytics Dashboard
The built-in Tidio analytics dashboard tracks conversation-level metrics - volume, response times, resolution rates, and CSAT scores. For visitor tracking specifically, monitor the number of proactive conversations initiated, the response rate to proactive messages (what percentage of visitors reply), lead capture flow completion rates, and conversion from visitor to known contact.
Connecting with External Tools
CRM integration. Connect Tidio with your CRM - HubSpot, Salesforce, or Pipedrive - so lead data flows automatically from chat conversations into your sales pipeline. When a visitor completes a lead capture flow, their contact record, browsing history, and qualification responses should appear in your CRM without manual data entry.
Email marketing integration. Link Tidio with platforms like Mailchimp or ActiveCampaign email marketing to add captured leads to email nurture sequences automatically. Tag-based segmentation in Tidio maps directly to list segmentation in your email platform.
Measuring Lead Generation ROI
Track these metrics monthly to evaluate whether your visitor tracking and lead generation setup is delivering value.
- Visitor-to-lead conversion rate: What percentage of website visitors provide their contact information through Tidio interactions? A rate of 2-5% is healthy for most businesses (see Invesp’s conversion rate benchmarks).
- Proactive chat response rate: What percentage of visitors who receive a proactive message actually reply? Rates above 10% indicate your messaging and timing are effective.
- Lead-to-customer conversion rate: Of the leads captured through Tidio, how many eventually become paying customers? This is the metric that justifies the entire setup.
- Cost per lead: Compare the cost of your Tidio plan to the number of leads generated. Divide your monthly Tidio cost by the number of qualified leads captured to get your cost-per-lead figure.
Pro Tips
Start with one high-intent trigger, not five. It is tempting to set up proactive chat on every page immediately. Resist that. Start with a single trigger on your highest-value page - usually pricing or a top product page. Measure the results for two weeks, optimize the messaging, then expand to additional pages. One well-tuned trigger outperforms five poorly configured ones.
Use visitor tracking data to improve your website, not just your chat. If you notice that most visitors who reach your pricing page leave within 10 seconds, the problem is not the lack of a chat trigger - it is the pricing page itself. Visitor behavior data reveals UX issues that go beyond what a chatbot can fix. Use this data, paired with session-replay tools like Hotjar or PostHog Session Replay, to identify pages with high bounce rates, confusing navigation paths, and content gaps.
Time your triggers to business hours. Proactive messages that fire at 2 AM when no one is available to respond create a terrible experience. Either configure triggers to only fire during your operating hours or ensure that Lyro AI is configured to handle the resulting conversations after hours.
Tag aggressively, but review tags monthly. Over-tagging is better than under-tagging because you can always filter down later. But tags accumulate quickly and become meaningless if you do not prune them. Set a monthly reminder to review your tag list, merge duplicates, and remove tags that no one uses for segmentation or reporting (a habit borrowed from the agile retrospective playbook).
Do not ask for too much information too soon. The first interaction with a new visitor should capture one piece of data - usually an email address. Asking for name, company, phone number, role, and budget in a single flow has a completion rate near zero. Capture the email first, then gather additional qualification data in follow-up conversations or email sequences. The end goal: send qualified leads into Tidio and your downstream CRM (a Mailchimp or ActiveCampaign free trial automation, for example) so the conversation continues even after they leave your site.
Frequently Asked Questions
Does Tidio visitor tracking work on all website platforms?
Yes. Tidio visitor tracking works on any website where the Tidio chat widget is installed - WordPress, Shopify, Wix, Squarespace, custom-built sites, and any other platform that supports JavaScript. The tracking functionality is built into the widget code, so there is no separate installation step. If your chat widget is working, visitor tracking is active. For platform-specific installation help, see the Getting Started guide or the Shopify integration guide.
Can I see what pages a visitor viewed before they started chatting?
Yes. When a visitor initiates a conversation or responds to a proactive message, their complete browsing history for the current session is visible in the conversation panel. You can see every page they visited, how long they spent on each page, and the order they navigated through your site. For returning visitors, you can also view their browsing history from previous sessions, giving your agents full context before they even respond.
How does Tidio handle visitor privacy and GDPR compliance?
Tidio provides tools to help you comply with privacy regulations including GDPR. You can enable a cookie consent banner that asks visitors for permission before tracking begins, configure data retention policies, and honor data deletion requests through the Tidio dashboard. Visitors who decline cookies are not tracked, though they can still use the chat widget for conversations. Review Tidio’s privacy documentation and consult your legal team to ensure your specific implementation meets your regulatory requirements.
Will proactive chat messages annoy my visitors?
Only if they are poorly configured. The key factors are timing, frequency, and relevance. A single, well-timed message on a high-intent page (like pricing) with a clear value proposition gets response rates above 10%. Multiple messages firing on every page visit, or messages that appear the instant a page loads, will annoy visitors and may increase bounce rates. Start with one trigger, measure the response rate, and expand only when you have data showing visitors find the outreach helpful.
What is the difference between Flows-based lead capture and the pre-chat survey?
The pre-chat survey collects information before a conversation starts - it appears when a visitor opens the chat widget and asks for their name and email. Flows-based lead capture is proactive - it triggers based on visitor behavior and guides visitors through a conversational sequence designed to qualify and capture leads. The pre-chat survey is passive (visitors must initiate), while Flows are active (you initiate based on behavior). Most effective setups use both: Flows for proactive engagement on key pages, and the pre-chat survey as a fallback for visitors who open the chat widget on their own.
Can I track visitors across multiple domains?
Each Tidio project tracks visitors on a single domain. If you run multiple websites, you need separate Tidio projects for each one. Visitor data does not merge across projects, so a visitor who browses your main site and then visits your support portal would appear as two separate visitors. If cross-domain tracking is critical for your business, consider using your CRM as the unifying layer - connect both Tidio projects to the same CRM and match contacts by email address.
Want to learn more about Tidio?
Related Guides
- Getting Started with Tidio - Account setup and initial configuration
- Tidio Flows Automation Guide - Visual builder for lead capture sequences
- Tidio Analytics Dashboard - Metrics and reporting for conversation performance
- Tidio Live Chat Customization - Widget appearance and branding
- Tidio Multichannel Support - Connect Messenger, Instagram, and email
Related Reading
External Resources
- Tidio Official Website - Plans, signup, and product pages
- Tidio Pricing - Conversation limits and visitor-tracking tier features
- Tidio AI Agent (Lyro) - Lyro AI overview
- Tidio Help Center - Visitor tracking and Flows documentation
Related Guides
- Activecampaign AI Content Generation: Complete 2026 Guide
- ActiveCampaign AI Features: Active Intelligence Guide
- Activecampaign Automation Builder: Complete 2026 Guide
- Activecampaign Brand Kit: 2026 Walkthrough for Teams
- ActiveCampaign Conditional Content: Personalization Guide
- ActiveCampaign CRM Setup: How to Set Up ActiveCampaign CRM
- ActiveCampaign Deals Pipeline: Stages & Automation
- ActiveCampaign Deliverability: Best Practices Guide
- ActiveCampaign Email Automation: 10 Workflows That Work
- ActiveCampaign Email Campaign Setup: Step-by-Step Guide