Your live chat widget is the first touchpoint between your brand and a website visitor looking for help - and as any AI chatbot customer service strategy will tell you, first impressions shape the entire support experience. The default Tidio live chat customization settings are functional out of the box, but a generic blue chat bubble sitting in the corner of a carefully designed website creates an immediate disconnect. Visitors notice when something feels bolted on rather than built in, and that subtle friction lowers engagement before a single message is exchanged.
The good news is that Tidio provides a thorough set of customization options that let you transform the chat widget into something that looks and feels native to your site. You can match your brand colors, swap in your own logo, craft welcome messages that speak in your voice, configure operating hours, collect visitor information through pre-chat surveys, and control how the widget behaves across desktop and mobile devices. This guide walks through every customization option available, step by step, so you can set up a polished live chat experience in about 20 minutes.
Whether you are setting up Tidio for the first time or revisiting your widget settings after the initial setup, this guide covers the full range of Tidio live chat customization options. If you have not installed Tidio yet, start with the Getting Started with Tidio guide and come back here once your widget is live.
Tidio Live Chat Customization: Accessing Widget Settings
All tidio live chat customization happens in one place within the Tidio dashboard. Here is how to get there.
Step 1: Log into your Tidio dashboard at tidio.com.
Step 2: Click Settings in the left sidebar navigation. This opens the main settings area where you manage all channel configurations, team settings, and account preferences.
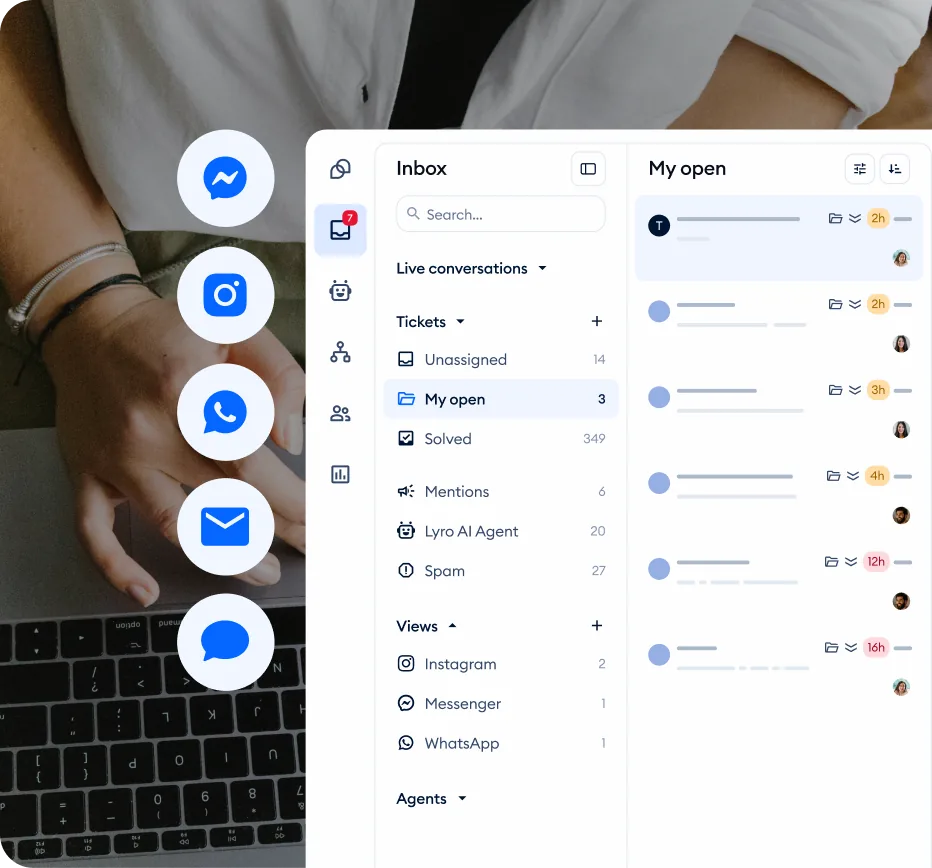
Step 3: Navigate to Channels > Live Chat. This section contains all the customization tabs for the chat widget - Appearance, Visitor Notifications, Operating Hours, Pre-chat Survey, and more.
Step 4: Click Appearance to start with the visual settings. This is the panel where you control colors, widget position, logo, and branding badge visibility for Tidio.
The settings panel shows a live preview of your widget on the right side of the screen, so you can see changes in real time as you make them.
Color and Theme Customization
Color is the most immediate way to make the chat widget feel like a natural part of your website during tidio live chat customization - a mismatched widget color stands out, and not in a good way.
Setting Your Brand Color
Navigate to Settings > Channels > Live Chat > Appearance. The color picker is the first option you see in this panel.
Using preset themes. Tidio offers a row of preset color options - standard choices like blue, green, red, purple, and black. These are convenient if your brand uses a common color and you want to get set up quickly. Click any preset swatch to apply it instantly to the widget preview.
Using custom hex codes. For precise brand matching, click the color picker to open the full color selector, or type your exact hex code directly into the input field. If your brand guidelines specify that your primary color is #2D5BFF, enter that value to get an exact match. This is the approach most businesses should take - your marketing team or designer can provide the exact hex code from your brand style guide.
What the color affects. The primary color you choose applies to several widget elements simultaneously:
- The chat bubble icon (the floating button visitors click to open the chat)
- The header bar at the top of the open chat window
- Send button and interactive elements within the conversation
- Message bubbles for agent responses
Contrast and Readability Considerations
When choosing your widget color, consider the contrast between the background color and the white text that overlays it. Light colors like pale yellow or light gray make the header text difficult to read. Dark or saturated colors - navy blue, forest green, deep purple - provide strong contrast and keep everything legible.
Also consider how your chosen color contrasts with your website’s background. If your site has a dark footer area where the chat widget sits, a dark-colored widget can blend in and become hard to spot. In that case, choose a brighter accent color that draws the eye without clashing with your overall design.
Test the widget on your actual website after setting the color. The dashboard preview is helpful, but seeing the widget in context with your real content, images, and background colors is the only way to confirm it works visually. If you are still building your site, our roundup of the best AI website builders covers platforms that make it easy to integrate chat widgets during the design phase.
Widget Position
The chat widget’s screen position affects both visibility and usability. Tidio gives you two placement options, and the right choice depends on your site’s layout.
Left vs. Right Side Placement
Right side (default). The bottom-right corner is the standard placement that visitors expect. Years of convention across live chat tools have trained users to look for help in this corner. Unless you have a specific reason to move it, keep the widget here.
Left side. Switch to the bottom-left corner if your website has elements that conflict with the right-side placement. Common conflicts include scroll-to-top buttons, cookie consent banners, floating action buttons, or other third-party widgets (like feedback tools or social sharing buttons) that already occupy the bottom-right area. Having two floating elements stacked on top of each other creates a cluttered experience.
To change the position, navigate to Settings > Channels > Live Chat > Appearance and select your preferred side under the position option.
Mobile Considerations
The widget position on mobile follows the same left or right setting you choose for desktop. On mobile devices, the chat bubble is slightly smaller and positioned with enough margin from screen edges to avoid interfering with navigation gestures.
The expanded chat window takes up most of the screen on mobile regardless of which corner the bubble sits in, so the position setting primarily affects where the minimized bubble appears. Test on both iOS and Android to confirm the widget does not overlap with fixed navigation elements on your mobile site.
Welcome Messages
The welcome message is a short text that pops up above the chat widget when a visitor first arrives on your site. Getting this right meaningfully impacts whether visitors engage with the chat. If you are thinking about automating customer service more broadly, the welcome message is often the first piece of that puzzle.
Configuring Online and Offline Messages
Navigate to Settings > Channels > Live Chat > Visitor Notifications to set up your welcome messages. Tidio lets you configure two separate messages based on your team’s availability.
Online message (agents are available). This appears when at least one team member is active during your configured operating hours. Write something specific rather than generic:
- Generic: “How can I help you?”
- Specific: “Hi there - have a question about pricing or setup? We typically reply within 2 minutes.”
The specific version tells visitors what they can ask about and sets a response time expectation, both of which reduce hesitation.
Offline message (no agents available). This appears outside your operating hours or when all agents are set to away. Acknowledge the unavailability and provide an alternative path:
- “We are offline right now but typically respond within a few hours. Leave your email and question and we will get back to you.”
This message works alongside the offline form (covered in the Operating Hours section below), which collects visitor contact information so your team can follow up.
Crafting Effective Welcome Messages
A few principles make welcome messages more effective:
Keep it under 120 characters. The popup above the chat widget is small. Long messages get truncated or become difficult to read at a glance. Say what you need to say concisely.
Set expectations. Include your typical response time (“We reply in under 5 minutes”) or specify what you can help with (“Questions about orders, returns, or products?”). Visitors are more likely to engage when they know what to expect.
Match your brand voice. If your website copy is casual and friendly, the welcome message should match. If you run a professional services firm, keep the tone polished but approachable. Consistency between your site content and chat widget reinforces trust. The Tidio Lyro tone customization guide covers how to extend this voice consistency to AI-generated responses as well.
Avoid asking multiple questions. “How can I help? Want to see our latest deals? Need support?” overwhelms visitors with choices. Ask one thing.
A/B Testing Welcome Messages
Tidio does not include a built-in A/B testing feature for welcome messages, but you can run manual tests by changing the message every two weeks and comparing chat initiation rates in the Analytics dashboard. Even small changes in wording can produce measurable differences in engagement.
Custom Logo and Branding
Tidio offers several branding customization options depending on your plan tier.
Upload Your Logo
On paid plans (Starter and above), you can replace the default Tidio avatar with your own company logo. Navigate to Settings > Channels > Live Chat > Appearance and look for the logo upload option.
Upload a square image (minimum 200x200 pixels) in PNG or JPG format. This image appears in the chat widget header and alongside automated messages. Use your company logo or a branded icon rather than a photo of a person - agent profile photos serve that purpose separately.
Remove the “Powered by Tidio” Badge
The free plan displays a “Powered by Tidio” badge at the bottom of the chat widget. For businesses that want a fully white-labeled experience, you have two options to remove it:
Option 1: Purchase the branding removal add-on. Tidio offers a standalone add-on for $20 per month that removes the badge from the chat widget. This is available on any paid plan.
Option 2: Upgrade to Plus or Premium. The Plus and Premium plans include branding removal as a standard feature, along with other advanced capabilities. If you need the other features these plans offer, the branding removal is included at no additional cost. Check the pricing page for a full comparison. If you are evaluating whether Tidio is the right fit at these price points, our best AI chatbot platforms comparison covers how it stacks up against alternatives.
Custom Agent Profile Photos
Each team member can upload their own profile photo under Settings > Team. Pair this with the team management guide to set departments and role permissions before you onboard new agents. Click a team member’s name and upload a profile image. When that agent responds, their photo appears alongside their messages in the chat window.
Using real photos makes the chat experience feel personal. Visitors respond more positively when they can see they are talking to a real person rather than a faceless icon. Encourage all team members to upload a clear, professional headshot.
Operating Hours
Operating hours define when your team is available for live conversations and what visitors see when they are not.
Setting Your Availability Schedule
Navigate to Settings > Channels > Live Chat > Operating Hours to configure your schedule.
Step 1: Toggle operating hours on. By default, Tidio treats your team as always available. Turning on operating hours lets you define specific days and time ranges.
Step 2: Set hours for each day of the week. Click on each day to set start and end times. You can set different hours for different days - for example, 9 AM to 6 PM on weekdays and 10 AM to 2 PM on Saturdays, with Sundays offline.
Step 3: Select your timezone. Make sure the timezone matches where your support team operates. If you have team members in multiple timezones, set the operating hours to cover the full span of availability across all locations.
What Visitors See During Offline Hours
When operating hours are inactive, several things change in the visitor experience:
- The welcome message switches to your offline message (configured in the Visitor Notifications section)
- The chat widget can display an offline contact form instead of the live chat interface
- If Lyro AI is configured, it continues responding to visitors around the clock regardless of operating hours - this is one of the primary advantages of combining AI with human support
Configure the offline form. Under the offline settings, enable a simple form that collects the visitor’s name, email address, and message. Submissions arrive in your Tidio inbox as tickets that your team can respond to using the ticketing system workflow when they return online.
Pre-Chat Survey
A pre-chat survey collects visitor information before the conversation starts, giving your agents context and ensuring you have contact details for follow-up.
Enabling the Pre-Chat Survey
Navigate to Settings > Channels > Live Chat > Pre-chat Survey. Toggle the survey on to activate it. When enabled, visitors see a short form before they can type their first message.
Configuring Survey Fields
Tidio lets you add several field types to the pre-chat survey:
- Name - Identify the visitor by name throughout the conversation
- Email - Essential for follow-up and creates a contact record in your database
- Phone number - Useful for businesses where phone callbacks are part of the support process
- Custom fields - Add fields specific to your business, like order number, account ID, company name, or department
Required vs. Optional Fields
For each field, you can choose whether it is required or optional. Here is a practical approach:
Make email required. This is the single most important piece of contact information. Without it, you cannot follow up if the connection drops, send a transcript, or add the visitor to your CRM.
Make name required. Addressing visitors by name creates a more personal interaction. Agents who use the visitor’s name in conversation build rapport faster.
Make phone and custom fields optional. Requiring too many fields creates friction. If a visitor just wants a quick answer about your return policy, forcing them to enter a phone number and order number feels excessive. They may abandon the chat entirely. Keep mandatory fields to a minimum - typically just name and email - and let visitors fill in additional details if they choose.
Impact on Chat Engagement
Adding a pre-chat survey creates a small barrier to entry - some visitors will close the widget instead of completing the form. The tradeoff is that conversations that do start have higher quality, which matters for ecommerce conversion optimization where every interaction counts. If you notice a drop in chat initiation rates after enabling the survey, reduce the number of fields or make all fields optional except email. Pair the data you collect with visitor tracking for sharper lead qualification.
Notification Sounds and Alerts
Navigate to Settings > Notifications to manage how agents are alerted about new conversations and messages.
Desktop notifications. Enable browser push notifications so agents receive an alert when a new conversation starts or a visitor sends a message. Each agent can toggle desktop notifications from their profile settings. The browser prompts for notification permissions the first time this is enabled.
Sound alerts. Tidio plays an audible notification sound when a new message arrives. Toggle this on or off in the notification settings. For teams in shared office spaces, some agents may prefer to mute sounds and rely on visual notifications instead.
Email notifications. Configure email alerts for missed conversations - chats that arrived when no agent was available or that went unanswered for a set period. These serve as a safety net outside operating hours.
Mobile push notifications. Push notifications deliver alerts directly to agents’ phones via the Tidio mobile app. This is valuable for small teams where the same people handle support alongside other responsibilities. Enable push notifications in the app settings after downloading Tidio from the App Store or Google Play. Combine mobile alerts with the Tidio analytics dashboard so you can spot response-time gaps before customers complain.
Mobile Widget Settings
More than half of website traffic comes from mobile devices, so how the widget behaves on phones and tablets matters.
Navigate to Settings > Channels > Live Chat > Appearance and look for the mobile visibility toggle. You can show or hide the chat widget entirely on mobile devices.
When to hide on mobile. Some websites have a mobile layout where the chat widget interferes with critical elements - a floating add-to-cart button, a bottom navigation bar, or a mobile menu toggle. If the widget covers important functionality, hiding it on mobile may be the better choice.
When to keep it visible. For most businesses, keeping the widget visible on mobile is the right call. Mobile visitors often have urgent questions and live chat is the fastest way to get answers.
Mobile Display Behavior
When visible on mobile, the minimized state shows a small chat bubble that is easy to tap without being intrusive. Tapping it opens the chat window, which expands to fill most of the screen. The widget automatically adjusts its size and position for different screen sizes. Test on multiple devices or use your browser’s responsive design mode to confirm the chat bubble does not overlap with fixed elements on your mobile site.
Advanced Widget Options
Tidio provides several advanced options that give you finer control over how and when the widget appears.
Open Widget from a Custom Button or Link
You can trigger the Tidio chat widget to open from any element on your page using a simple JavaScript command. This is useful when you want to embed a “Chat with us” button in your navigation bar, footer, contact page, or inline within content.
Add the following JavaScript to any button or link’s click handler:
tidioChatApi.open();For example, if you have a button on your contact page:
<button onclick="tidioChatApi.open()">Chat with Support</button>When visitors click that button, the Tidio widget opens automatically. This approach is effective on pages where visitors are most likely to need help - product pages, pricing pages, and checkout flows. For online stores, pairing this with an AI chatbot for ecommerce can handle common purchase questions automatically. You can also use tidioChatApi.close() to close the widget and tidioChatApi.hide() to hide it entirely on specific pages.
Dedicated Chat Page
You can create a dedicated chat page on your website and use the JavaScript API to open the widget automatically when the page loads:
document.addEventListener("tidioChat-ready", function() {
  tidioChatApi.open();
});
This approach works well for support portals or help center pages where the primary action is starting a conversation.
File Attachment Settings
By default, visitors can send file attachments through the chat widget. Navigate to Settings > Channels > Live Chat to manage attachment settings, including maximum file size and allowed file types. For security reasons, disable attachment types you do not need (for example, executable files).
Device-Specific Visibility Rules
Using the JavaScript API, you can create custom rules for when the widget appears. For example, show the widget only on product pages and checkout while hiding it on blog posts or landing pages:
// Hide widget on specific pages
if (window.location.pathname.includes('/blog')) {
  document.addEventListener("tidioChat-ready", function() {
    tidioChatApi.hide();
  });
}
This requires basic JavaScript knowledge but does not require modifying Tidio’s core settings. For more sophisticated automation rules beyond visibility toggling, the Tidio Flows automation guide shows how to build conditional workflows that trigger based on visitor behavior.
Frequently Asked Questions
Can I change widget colors on the free plan?
Yes. Color customization is available on all plans, including the free plan. You can set a custom hex code to match your brand colors without upgrading. Logo customization and branding badge removal require paid plans.
How do I remove the Tidio branding badge?
The “Powered by Tidio” badge can be removed in two ways. Purchase the standalone branding removal add-on for $20 per month, which works on any paid plan. Alternatively, the Plus and Premium plans include branding removal as a standard feature. The free plan does not support branding removal.
Can I show different widgets on different pages?
Tidio does not support multiple widget configurations per project through the dashboard settings. However, you can use the JavaScript API (tidioChatApi.hide() and tidioChatApi.show()) to control widget visibility on specific pages. For entirely different widget designs on different pages, you would need separate Tidio projects, but this requires a Growth plan or higher.
Does the widget slow down my site?
Tidio loads asynchronously, which means it does not block your page content from rendering. The chat widget script is lightweight and typically adds less than 100ms to total page load time. Google Lighthouse tests generally show minimal impact on performance scores. If you are concerned about performance, you can defer the Tidio script to load after the main page content has rendered.
Can I customize the widget for mobile separately from desktop?
The core visual settings - colors, logo, and branding - apply to both desktop and mobile. You cannot set different colors for mobile versus desktop. However, you can toggle the widget’s visibility on mobile devices independently, and the widget automatically adjusts its size and layout for smaller screens. For more granular mobile control, use the JavaScript API to apply device-specific behavior.
How do I change the welcome message language for international visitors?
Tidio supports multilingual widget configurations. Navigate to Settings > Channels > Live Chat > Visitor Notifications and you can set messages in different languages. If you use Lyro AI alongside the live chat widget, the Tidio Lyro Multilingual Guide covers how to configure AI responses in multiple languages.
Want to learn more about Tidio?
The Bottom Line on Tidio Live Chat Customization
A 20-minute tidio live chat customization pass turns the default blue bubble into something that genuinely belongs on your site. Match your brand color, upload a logo if you are on a paid plan, write a welcome message that promises a specific response time, and configure operating hours so visitors know what to expect after-hours. If you want to remove the “Powered by Tidio” badge without committing to the Plus plan, the standalone branding add-on lives on the pricing page. Pair the customized widget with the Lyro AI agent to keep the experience polished even when nobody is online.
Related Guides
- Getting Started with Tidio - Account creation and widget installation
- Tidio + Shopify Integration Guide - Connect the customized widget to your store
- Tidio Lyro AI Setup Guide - Add AI responses to the chat experience
- Tidio Flows Automation Guide - Build automated conversations inside your branded widget
- Tidio Lyro Knowledge Base Guide - Train Lyro to answer customers in your tone
Related Reading
- Tidio - Full platform review with pricing breakdown and feature analysis
- Best Live Chat Software 2026 - How Tidio compares to LiveChat, Intercom, and others
- Best Customer Support Software 2026 - Complete roundup of AI-powered support tools
External Resources
- Tidio Help Center: Live Chat - Official documentation on widget settings and configuration
- Tidio JavaScript API Reference - Full method list for opening, closing, and hiding the widget programmatically
- WCAG Accessibility Guidelines - Color contrast standards for picking accessible widget colors
Related Guides
- AI Chatbots Customer Service Setup: Complete 2026 Guide
- AI Customer Service Automation: Chatbots vs Agentic AI
- Tidio Abandoned Cart Recovery: Automation Workflows
- Tidio Analytics Dashboard: 2026 Walkthrough for Teams
- Tidio Canned Responses and Macros for Faster Support
- Tidio Copilot Agent Assist: AI-Powered Agent Assist Guide
- Tidio CSAT Tracking: CSAT Tracking and Improvement
- Tidio Ecommerce Chatbot: Tidio Chatbot Flows for Ecommerce
- Tidio Ecommerce Support Automation: Automation Best
- Tidio Flows Automation: Visual Automation Builder Guide