Tidio team management is the foundation that everything else in your support operation builds on. You can have the best AI chatbot, the most polished canned responses, and a perfectly designed chat widget - but if your agents are not properly set up with the right roles, permissions, and routing rules, conversations fall through cracks, response times spike, and nobody knows who is responsible for what. The good news is that getting this right from the start takes about twenty minutes and saves you from reorganizing a messy setup later when your team grows.
This guide walks through the complete process of adding agents to your Tidio account, configuring roles and permissions so each team member sees only what they need, creating departments to organize your support structure, setting up chat routing to distribute conversations automatically, and configuring operating hours so customers know when to expect a response. Whether you are a small business adding your second support agent or a growing team managing a dozen people across time zones, these steps apply.
Prerequisites
Before you start adding team members, make sure you have these pieces in place.
An active Tidio account with the chat widget installed. Your Tidio team management login is the gateway to organizing the people who handle conversations. If you have not set up your account yet, complete Tidio sign up first and then return here - the Getting Started with Tidio guide covers the initial widget install. Everything in this guide assumes your Tidio instance is live and receiving conversations.
Admin access to your Tidio account. Only account administrators can add agents, create departments, and modify roles and permissions. If you are working within an existing Tidio setup, confirm that your account has admin privileges before proceeding.
A paid Tidio plan. The free Tidio plan limits you to a single operator. Adding team members requires a paid plan, and the number of included operator seats varies by tier. Check the Tidio pricing page for the most current seat limits by plan, then double-check tier benefits via the AI agent feature page if Lyro is part of your team plan. Each additional operator beyond your plan’s included seats incurs an extra monthly cost.
Email addresses for each team member. Your Tidio team management email workflow relies on invitations, so you need a valid address for each person you plan to add. Agents will use these emails to log into their Tidio accounts and access the shared inbox. If you need a Tidio team management contact for billing or seat questions, reach out to Tidio support from your admin dashboard or open a ticket via the Tidio Help Center.
Add Your First Agent
Adding agents to Tidio is straightforward. Each agent gets their own login credentials, name, and avatar that appear in the chat widget when they are online.
Step 1: Open Settings. Log into your Tidio dashboard and click the Settings gear icon in the left sidebar.
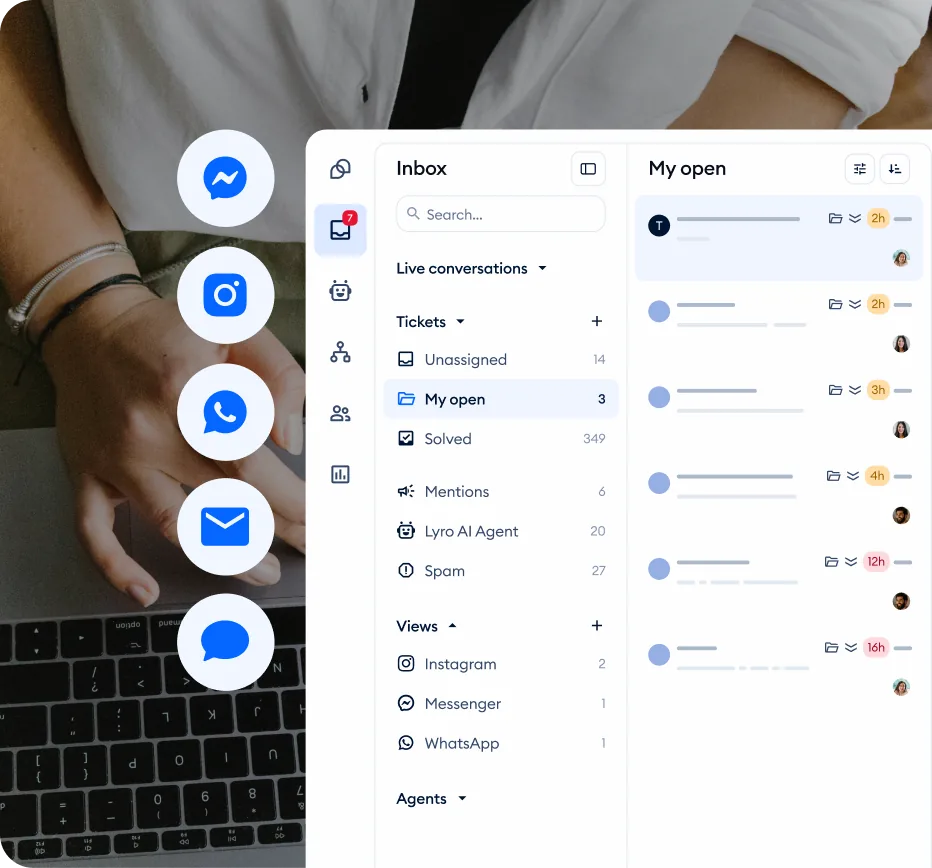
Step 2: Navigate to the Operators section. Look for the Operators or Team option within your settings. This is where you manage all agent accounts - adding new people, editing existing profiles, and removing agents who have left the team.
Step 3: Click Add Operator. Hit the Add button to start the invitation process. Tidio will ask for the new agent’s name and email address.
Step 4: Fill in agent details. Enter the agent’s full name as you want it to appear in the chat widget. Customers see this name when they are connected to the agent, so use a format that fits your brand - first name only for a casual feel, first and last name for a professional tone. Add their email address, which Tidio uses to send the invitation.
Step 5: Send the invitation. Click Send Invitation and Tidio emails the agent with a link to set up their account. They will create a password (use a strong password per CISA guidance), set up their profile avatar, and gain access to the shared inbox.
Step 6: Verify the agent’s access. Once the agent accepts the invitation and logs in, confirm that they can see the inbox, access conversations, and respond to test messages. Have them send a test reply to verify everything is connected properly. The same verification approach applies if you’re integrating Tidio with a CRM like ActiveCampaign for contact sync - you can review ActiveCampaign’s pricing and start a free trial to evaluate whether adding email automation makes sense alongside your Tidio setup.
Repeat for additional agents. Follow the same process for each team member you want to add. There is no batch import - each agent gets an individual invitation. For larger teams, consider adding agents in batches of three or four and verifying access at each stage rather than inviting everyone at once and troubleshooting multiple issues simultaneously.
Configure Roles and Permissions
Not every agent needs access to everything. Tidio lets you assign roles that control what each team member can see and do within the platform. Getting permissions right prevents accidents, protects sensitive data, and keeps your team focused on their specific responsibilities.
Understanding Tidio’s Role Hierarchy
Tidio uses a role-based system with distinct permission levels.
Admin. Full access to everything - settings, billing, analytics, agent management, and all conversations. Admins can add and remove agents, change plan settings, configure integrations, and access all reports. Limit admin access to one or two people in your organization. This is typically the account owner and one backup.
Agent (Operator). Access to the shared inbox, assigned conversations, and basic reporting. Agents can handle conversations, create tickets, and use canned responses, but they cannot modify account settings, manage other agents, or access billing information. This is the right role for frontline support staff who need to focus on customer interactions.
Viewer or limited roles. Depending on your plan, Tidio may offer additional role tiers that restrict access further - for example, a role that can view conversations and reports but cannot respond to customers. This is useful for managers who need visibility without handling conversations directly, or for quality assurance reviewers who review transcripts. Role-based access control is well-explored in NIST’s RBAC reference if you want background on least-privilege design.
Assigning Roles
Step 1: Go to your Operators list. Navigate to Settings then Operators to see your full team roster.
Step 2: Click on an agent’s profile. Select the team member whose role you want to configure.
Step 3: Set their role. Choose the appropriate role from the dropdown menu. The change takes effect immediately - the agent’s interface updates to reflect their new permissions the next time they refresh or log in.
Step 4: Verify the permissions. Ask the agent to confirm what they can and cannot see. A quick verification prevents confusion later when an agent tries to access something they do not have permission for and thinks the system is broken.
Permission Best Practices
Start restrictive, then expand. Give new agents the minimum permissions they need to do their job. It is much easier to grant additional access when someone needs it than to clean up after an agent accidentally changes a critical setting.
Separate billing from support. Your support agents do not need to see your Tidio subscription details, payment history, or plan configuration. Keep billing access restricted to admins only. If you are comparing permission models across platforms, our best live chat software roundup covers how different tools handle role-based access.
Review permissions quarterly. As team members change roles, take on new responsibilities, or leave the organization, their Tidio permissions should update accordingly. A quarterly review catches outdated access before it becomes a problem.
Tidio Team Management: Departments and Group Structure
Departments let you organize your team into functional groups that match your support structure. Instead of every agent seeing every conversation, departments route specific types of inquiries to the people best equipped to handle them.
When Departments Make Sense
You have more than three agents. With two or three agents, everyone can handle everything and a single shared queue works fine. Once you pass three agents, conversations start getting picked up by whoever is fastest rather than whoever is most qualified - and quality suffers.
Your agents have different specializations. If your team includes people with distinct expertise - billing specialists, technical support engineers, product experts, shipping coordinators - departments let you match conversations to competence.
You serve different customer segments. If you support both free and paying customers, or both consumers and business accounts, departments let you prioritize and route based on customer type.
Setting Up Departments
Step 1: Navigate to department settings. In your Tidio dashboard, go to Settings and look for the Departments or Groups section.
Step 2: Create your first department. Click Add Department and give it a clear, functional name. Use names that describe the work, not internal jargon. “Billing Support” is clearer than “Team Alpha.” “Technical Help” is better than “Tier 2.”
Step 3: Assign agents to the department. Select which team members belong to this department. An agent can belong to multiple departments if their role spans different areas - a senior agent might be in both “General Support” and “Escalations,” for example.
Step 4: Configure the department’s chat widget presence. Decide whether customers can choose a department before starting a chat (a pre-chat dropdown asking “What can we help you with?”) or whether routing happens automatically behind the scenes. Customer-facing department selection works well when your categories are simple and clear. Automated routing is better when the categories require context that customers may not know how to self-select.
Step 5: Repeat for remaining departments. Create each department your team needs - a tidio team management structure that mirrors your real org chart prevents misrouted tickets. Common configurations include:
- General Support - Handles first-contact inquiries that do not fit a specific category
- Billing - Payment issues, plan changes, refund requests, invoicing questions
- Technical Support - Product bugs, integration issues, troubleshooting
- Sales - Pre-purchase questions, product comparisons, enterprise inquiries
Step 6: Set a default department. Designate one department as the default catch-all for conversations that do not match any routing rule. This prevents unrouted conversations from sitting in limbo with no one assigned.
How Do You Set Up Chat Routing in Tidio?
Routing determines how incoming conversations get distributed across your team and departments. Without routing rules, conversations pile up in a general queue and depend on agents manually claiming them - which is slow and leads to cherry-picking where agents grab the easy ones and leave complex issues untouched.
Routing Methods
Round-robin. Distributes incoming conversations evenly across all available agents (or all agents within a department). Agent A gets the first conversation, Agent B gets the second, Agent C gets the third, then back to Agent A. This is the fairest distribution method and works well when all agents in a group have similar capabilities. (See the round-robin scheduling overview for the underlying concept.)
Auto-assignment to least busy. Routes each new conversation to the agent currently handling the fewest active chats. This balances workload in real time rather than just distributing sequentially. Useful when conversation lengths vary significantly - one agent might close five quick questions while another is still working through a complex troubleshooting session. (See least-connection load balancing for the analogous server-side concept.)
Manual assignment. Conversations enter a shared queue and agents pick them up manually. This gives agents autonomy but requires a team lead to monitor the queue and reassign conversations that sit too long. Best for small teams of two to three agents where the overhead of automated routing is not justified.
Configuring Routing Rules
Step 1: Go to routing settings. Navigate to Settings and find the Routing or Chat Assignment section.
Step 2: Choose your primary routing method. Select round-robin, auto-assignment, or manual for your default routing behavior. If you have departments, you can set different routing methods for each department.
Step 3: Set agent capacity limits. Define the maximum number of simultaneous conversations each agent can handle. A common starting point is three to five active conversations per agent. If you set the limit too high, response times within each conversation will lag. If you set it too low, agents will sit idle while conversations queue unnecessarily.
Step 4: Configure overflow rules. Define what happens when all agents in a department are at capacity. Options typically include queueing the conversation with an estimated wait time, routing to a different department, or triggering Lyro AI - powered by Anthropic’s Claude models and detailed in the AI agent documentation - to handle the initial interaction until an agent becomes available.
Step 5: Test your routing. Open multiple chat windows on your website simultaneously and verify that conversations distribute according to your rules. Have agents log in and out to confirm that routing adapts correctly when team availability changes.
Configure Operating Hours
Operating hours tell Tidio when your team is available for live chat. Outside these hours, the system can display an offline message, switch to email-only mode, or hand everything to Lyro AI. Setting this up correctly manages customer expectations and prevents conversations from going unanswered during off-hours.
Setting Your Schedule
Step 1: Navigate to operating hours. Go to Settings and find the Operating Hours or Business Hours section.
Step 2: Define your weekly schedule. Set the days and hours when your team is online and available for live conversations. Be honest about your actual availability - listing hours where no agents are reliably online creates worse experiences than telling customers up front that you are closed.
Step 3: Set your timezone. Choose the primary timezone for your business. If your team spans multiple time zones, set the operating hours to reflect the combined coverage window. For example, if your team covers US Eastern and UK time, your operating hours might run from 5 AM to 9 PM Eastern. Reference the IANA time zone database if you ever need to script schedules for less-common regions.
Step 4: Configure offline behavior. Decide what happens when a customer visits your site outside operating hours.
- Offline message. Display a message like “We are currently offline. Leave a message and we will get back to you during business hours.” The customer can submit their question as an email or ticket.
- Lyro AI coverage. Keep the chat widget active with Lyro handling conversations automatically. Customers get immediate responses for questions Lyro can answer, and complex issues create tickets for your team to handle when they return. Combining after-hours AI coverage with well-organized automation flows ensures customers always receive a timely response.
- Hide the widget. Remove the chat widget entirely outside business hours. This is the simplest approach but sacrifices the opportunity to capture after-hours inquiries.
Step 5: Configure holiday schedules. If your team takes planned days off - national holidays, company events, seasonal closures - add these as exceptions to your regular schedule. This prevents the widget from showing “online” status when nobody is available.
Timezone Considerations for Global Teams
If your agents work across different time zones, operating hours become a coverage planning exercise.
Map your coverage. List each agent’s working hours in their local time, then convert everything to a single reference timezone. Identify the gaps - the hours where zero agents are online - and decide how to cover them. Options include hiring in a time zone that fills the gap, having agents shift their schedules, or relying on Lyro for the uncovered hours. Use a tool like timeanddate.com’s meeting planner to visualize where the dead zones fall.
Use department hours. If different departments operate on different schedules - your sales team is available 9 to 5 while your technical support runs 8 to 10 - configure operating hours per department rather than for the whole account. Customers reaching out for technical help at 9 PM can still get routed to your tech team while the sales department shows as offline.
Agent Onboarding Workflow
Adding an agent’s account is the technical step. Onboarding them to actually handle conversations effectively is the operational step that determines whether your team scales smoothly or stumbles.
Day One Checklist
Account access. Confirm the agent can log in, see the inbox, and access their assigned departments. Run through a test conversation to verify chat routing delivers messages to them.
Tool orientation. Walk through the Tidio interface - the inbox layout, how to accept and transfer conversations, how to use canned responses, how to create tickets, and how to mark conversations as resolved. Show them where to find their performance metrics and operating hour schedules. A 30-minute demo recorded with Loom is usually enough to onboard the next hire without a live walkthrough.
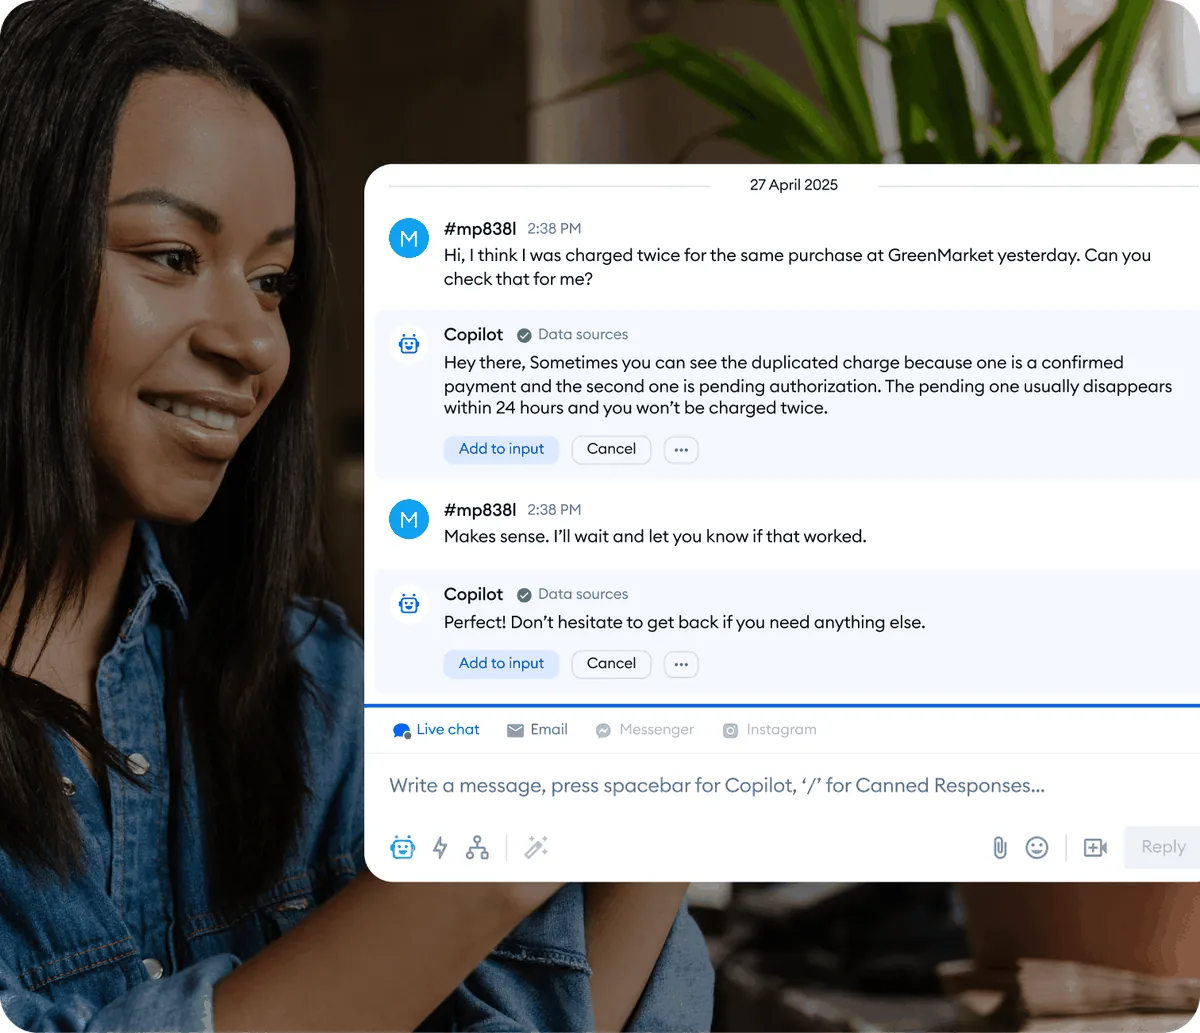
Copilot setup. If your team uses Tidio Copilot, demonstrate how AI suggestions appear during conversations and how to accept, edit, or dismiss them. New agents benefit enormously from Copilot because it gives them access to institutional knowledge they have not memorized yet.
Shadowing. Have the new agent shadow an experienced team member for their first shift. They watch conversations in real time, see how the veteran handles different question types, and observe the pacing and tone that work for your customer base.
First Week Goals
Handle supervised conversations. Let the new agent take on live conversations while a senior agent monitors and provides feedback. Start with straightforward questions and gradually increase complexity.
Learn the knowledge base. Have the agent read through your most common FAQ entries, product documentation, and any internal guides that cover common customer issues. The better they know your content, the faster they respond - and the more effectively they use Copilot suggestions.
Review CSAT feedback. At the end of the first week, review the new agent’s customer satisfaction scores together. Early feedback helps course-correct before habits set in.
Performance Monitoring
Once your team is set up and handling conversations, you need visibility into how things are working. Tidio provides analytics that let you track agent performance, identify bottlenecks, and make data-driven decisions about staffing and routing.
Key Metrics to Track
Conversations handled. The raw volume each agent manages during their shift. Large disparities between agents might indicate routing imbalances, different shift lengths, or some agents avoiding complex conversations.
Average response time. How quickly each agent replies to customer messages within a conversation. This is different from first response time - it measures the ongoing pace of the interaction. Customers notice when an agent takes five minutes between each reply in a supposedly “live” chat (research from Salesforce’s State of the Connected Customer consistently shows speed-of-response among the top satisfaction drivers).
Resolution rate. The percentage of conversations an agent resolves without needing to transfer or escalate. High transfer rates from a specific agent might indicate a training gap or a mismatch between their skills and the conversations being routed to them.
Customer satisfaction score. Per-agent CSAT scores reveal quality differences that volume metrics cannot capture. An agent who handles half the conversations of their peers but scores ten points higher on satisfaction is contributing differently than raw numbers suggest. Industry benchmarks like Zendesk’s customer service statistics can ground your internal CSAT targets.
Using Performance Data
Weekly team reviews. Share aggregate team performance data weekly - not to rank agents against each other but to identify trends. Is overall response time creeping up? Are certain departments handling more volume than their staffing supports?
Individual coaching. Use per-agent metrics for one-on-one conversations. Pair the data with conversation transcript reviews for context. A slow average response time paired with high CSAT might mean the agent is thorough and thoughtful - not slow. A fast response time with low CSAT might mean they are rushing and not addressing the customer’s actual question.
Staffing decisions. If your data consistently shows that conversations spike between 2 PM and 5 PM and your operating hours run until 6 PM, consider shifting schedules so more agents are online during the peak window. Atlassian’s capacity planning guide covers a similar approach for engineering teams. For businesses managing conversations across live chat, email, and social media, the multichannel support guide covers how to unify those channels under a single team structure. If your analytics show that technical support tickets take three times longer to resolve than general inquiries, your technical department might need more agents even if total volume is lower.
Scaling Your Team
As your business grows, your Tidio team management setup needs to evolve. What works for three agents breaks down at ten, and what works at ten needs restructuring at twenty-five.
Revisit departments. When your team was small, a single “Support” department handled everything. As you scale, split into specialized departments based on your most common inquiry types. Review your ticketing system data to see which categories generate the most volume and staff accordingly.
Layer your routing. Simple round-robin works for a small team. At scale, implement skill-based routing that matches conversation topics to agents with relevant expertise. Tag agents with their skills - “billing-certified,” “technical-advanced,” “returns-specialist” - and set up routing rules that use these tags.
Expand Lyro coverage. As your team grows, your AI should grow too. Every question that Lyro handles automatically is a conversation your human agents do not need to touch. Review your Lyro knowledge base monthly and add content based on the questions your agents handle most frequently.
Promote team leads. Once you pass five or six agents, you need someone whose primary job is managing the team rather than handling conversations. Promote a strong performer to a team lead role with admin access, and make them responsible for queue monitoring, quality reviews, and schedule management. The Harvard Business Review’s framing of leader-as-coach is a useful read for first-time team leads.
Document your processes. The knowledge that lives in your experienced agents’ heads needs to be written down before you scale. A solid internal knowledge base also feeds directly into Lyro AI, allowing the AI to handle more questions accurately as your documentation improves. Create internal guides for handling common scenarios - refund procedures, escalation criteria, when to create tickets versus resolve in chat. New hires should be able to read these documents and handle 80% of conversations on their own within their first week. Tools like Notion or Slab work well as the internal-wiki layer that backs your tidio team management workflow.
Frequently Asked Questions
How many agents can I add to my Tidio account?
The number of included operator seats depends on your Tidio plan. The free plan includes one operator. Paid plans include varying numbers of seats, and you can add more operators beyond your plan’s included count for an additional monthly fee per seat. Check the pricing page for the current per-seat pricing and plan limits.
Can an agent belong to multiple departments?
Yes. An agent can be assigned to as many departments as makes sense for their role. A senior agent might belong to both “General Support” and “Escalations,” while a specialist might belong to “Billing” and “Sales.” When a conversation comes in for any of their assigned departments, they are eligible to receive it through routing. Just be mindful of capacity - an agent in four departments can get overwhelmed if all four are busy simultaneously.
What happens to an agent’s conversations when I remove them from the account?
When you remove an agent, their active conversations need to be reassigned. Tidio will either transfer open conversations to the general queue or to a specific agent you designate, depending on your settings. Resolved conversation history is preserved in the system - removing an agent does not delete their past interactions. Before removing an agent, check for any open conversations or pending tickets assigned to them and transfer those manually to avoid anything falling through the cracks.
Can I set different operating hours for different departments?
Yes. Each department can have its own operating schedule. This is useful when different teams cover different time windows - your sales department might operate 9 AM to 6 PM on weekdays, while your technical support team runs 8 AM to 10 PM including weekends. Per-department operating hours also let you configure different offline behaviors, so sales inquiries outside business hours might show a contact form while technical questions get routed to Lyro.
How do I handle agents in different time zones?
Set each agent’s individual schedule to reflect their local working hours. Tidio tracks availability at the individual agent level, so an agent in London working 9 AM to 5 PM GMT and an agent in New York working 9 AM to 5 PM EST both show as online during their respective hours. Your overall operating hours should reflect the combined coverage window, and routing rules will automatically send conversations only to agents who are currently online.
What is the difference between an admin and an operator role?
Admins have full control over the Tidio account - they can access billing, modify settings, add or remove team members, configure integrations, and view all analytics. Operators (agents) have access to the conversation inbox and basic tools they need to handle customer interactions, but they cannot change account-level settings or manage other team members. Keep admin access limited to one or two trusted people to prevent accidental changes to critical configurations.
Want to learn more about Tidio?
Related Guides
- Getting Started with Tidio - Account setup, widget installation, and initial configuration
- Tidio Ticketing System Guide - Create tickets, manage priorities, and track resolution metrics
- Tidio CSAT Tracking Guide - Measure customer satisfaction and benchmark agent performance
- Tidio Copilot Agent Assist - AI-powered reply suggestions for faster agent responses
- Tidio Multichannel Support - Connect Messenger, Instagram, and email to one inbox
Related Reading
External Resources
- Tidio Official Website - Plans, signup, and product pages
- Tidio Pricing - Operator-seat costs by tier
- Tidio AI Agent (Lyro) - Lyro AI overview and capabilities
- Tidio Help Center - Operator setup and routing documentation
Related Guides
- Activecampaign AI Content Generation: Complete 2026 Guide
- ActiveCampaign AI Features: Active Intelligence Guide
- Activecampaign Automation Builder: Complete 2026 Guide
- Activecampaign Brand Kit: 2026 Walkthrough for Teams
- ActiveCampaign Conditional Content: Personalization Guide
- ActiveCampaign CRM Setup: How to Set Up ActiveCampaign CRM
- ActiveCampaign Deals Pipeline: Stages & Automation
- ActiveCampaign Deliverability: Best Practices Guide
- ActiveCampaign Email Automation: 10 Workflows That Work
- ActiveCampaign Email Campaign Setup: Step-by-Step Guide