The murf AI voice changer takes a recording of any voice - yours, a colleague’s, a rough demo narrated on your phone - and replaces it with a polished AI voice while keeping the timing and pacing of the original. Because this voice changer online runs entirely in the browser, no voice changer download is needed, and the result is broadcast-quality audio without a studio, a microphone upgrade, or a re-recording session.
This is different from text-to-speech. You are not typing a script and generating speech from scratch. You are uploading an existing audio file and telling Murf AI to map that performance - the natural pauses, the emphasis, the rhythm - onto one of 200+ AI voices. The output preserves your intended delivery while eliminating the acoustic problems of the original recording.
For content creators who narrate drafts in their car, educators who record lessons on a laptop mic, or marketing teams who need polished audio from a rough stakeholder recording, Voice Changer closes the gap between a usable take and a professional voiceover without adding time to the production cycle. Our Murf getting started guide covers the underlying Studio basics if you are brand new to the platform.
Overview: What is Murf AI Voice Changer
Voice Changer is a conversion feature inside the Murf Studio that performs audio-to-audio transformation - the same Studio that also functions as a full AI voice generator for text-to-speech work. You provide a source recording, select a target AI voice, and the system produces a new audio file that sounds like that AI voice delivering your original performance.
The technology works by extracting the prosodic structure of your recording - the timing, pacing, emphasis patterns, and natural pauses - and using that structure as a template for the AI voice synthesis. The output is not a simple pitch shift or voice filter applied on top of your recording. The original voice is replaced entirely. What carries over is the performance itself: the way you paused before a key point, the slight speedup during a list, the natural breath points at the end of long sentences.
What Voice Changer is designed for:
- Converting rough demo recordings to polished AI voiceovers without re-recording (start with our Murf script writing tips if you need to tighten the underlying script first)
- Replacing a non-native speaker’s narration with a fluent AI voice while keeping their scripted delivery
- Standardizing audio quality across a series recorded at different times or on different equipment
- Producing a publishable voiceover from a phone or laptop recording when studio conditions are not available
What Voice Changer does not do:
- It is not a real-time voice modulator for live calls or streaming
- It does not translate language - source and output audio share the same language
- It cannot reconstruct heavily distorted or clipped audio - the source file needs to be intelligible
The output quality depends significantly on the clarity of your input recording. Clean audio with minimal background noise produces the best results. The AI can work around a slightly noisy recording, but it cannot fix audio that is unintelligible. A usable phone recording in a quiet room is entirely workable. A recording taken in a loud cafe is not. The Transom microphone primer is a useful reference for understanding what your input mic can and cannot capture.
When to Use Voice Changer vs. Text-to-Speech
Both tools produce AI voiceovers, but they serve different workflows - and whether you reach for the voice changer free tier or a paid Studio plan, understanding the distinction saves you time and produces better output.
Use Voice Changer when:
You already have a recording. If you have narrated the content - even in a rough, low-quality format - Voice Changer is almost always faster than retyping the entire script and regenerating from text. The performance you captured in the recording (pacing, emphasis, natural pauses) carries over to the AI output, which typically sounds more natural than typing out punctuation and pause markers to recreate the same effect in a text editor.
You are working with non-scripted speech. Interviews, live commentary, and spontaneous narration contain natural delivery patterns that are difficult to replicate in a typed script. Voice Changer preserves those patterns while improving the audio quality. The Murf variability tips guide covers why preserving natural delivery matters.
You need to process multiple voices into a single consistent voice. If you recorded a multi-person interview or panel discussion and need consistent audio quality throughout, Voice Changer lets you convert each speaker’s segments using the same target voice, producing a uniform-sounding output.
Use text-to-speech when:
You are starting from a written script with no existing recording. Text-to-speech is faster when there is no source audio - you paste the script, select a voice, and generate.
You need to make frequent script revisions. Editing text is faster than re-recording. If the content is likely to change - a product that is still being defined, a policy that has not been finalized - text-to-speech gives you better iteration speed.
You need a voice in a different language than your source material. Voice Changer works within a single language. For multilingual output from an English source, use text-to-speech with Murf’s MultiNative feature - covered in our Murf MultiNative multilingual guide.
The practical rule: If a recording exists, start with Voice Changer. If no recording exists, use text-to-speech - our Murf text-to-speech tutorial walks through that workflow end-to-end. If you need to update the content significantly, switch to text-to-speech for the revised sections and keep Voice Changer for the unchanged ones.
What Plan You Need
Voice Changer is available on the Creator plan and above. It is not included in the free tier or the Basic plan.
Here is how plan access breaks down for Voice Changer and related features:
| Feature | Free | Basic | Creator | Pro | Enterprise |
|---|---|---|---|---|---|
| Voice Changer | No | No | Yes | Yes | Yes |
| AI voices (200+) | Limited | Limited | Full | Full | Full |
| Export formats (WAV/MP3) | MP3 only | MP3 only | WAV + MP3 | WAV + MP3 | All formats |
| Monthly generation (minutes) | 10 | 120 | 500 | Unlimited | Custom |
| Commercial usage rights | No | No | Yes | Yes | Yes |
| Priority rendering | No | No | No | Yes | Yes |
The Creator plan runs $29/month on monthly billing, with a discount on annual billing. For individuals producing regular content with Voice Changer, the Creator plan is the practical starting point. The Business plan adds team collaboration features and expanded generation - worth the upgrade if you produce high volumes or need your own cloned voice alongside the Voice Changer workflow.
Enterprise plans include custom generation limits, dedicated account support, and additional compliance features. Check the Murf pricing page for the most current plan details and any active promotions.
Step 1: Upload Your Audio Recording
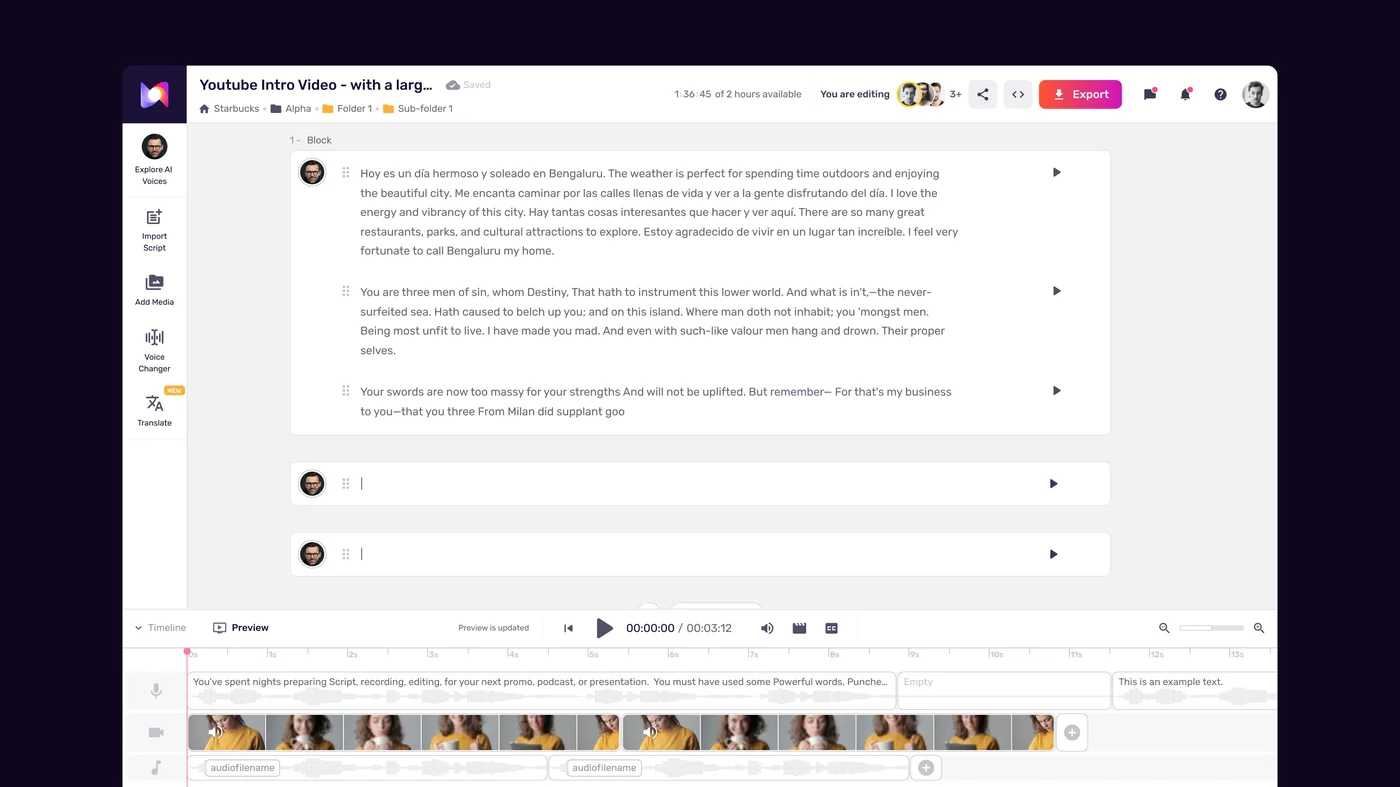
Log into your Murf AI account and navigate to the Studio dashboard. Create a new project or open an existing one where you want to add converted audio.
To access Voice Changer:
- In the Studio editor, look for the Voice Changer option in the left sidebar or the top navigation. On newer versions of the interface, it appears under “AI Voice Conversion” or “Convert Audio” depending on your account tier.
- Click “Upload Audio” or drag your source file directly into the Voice Changer panel.
- Murf accepts the following input formats: MP3, WAV, M4A, and OGG. The maximum file size is 500MB per upload.
Preparing your source recording before upload:
The single most important thing you can do to improve output quality is trim silence and fix obvious audio issues before uploading. You do not need professional audio software for this - Audacity is free and handles basic cleanup in a few minutes.
- Trim dead silence at the beginning and end of the file. Murf handles internal pauses well, but leading or trailing silence can affect how the AI reads the overall pacing.
- Reduce background noise if your recording has consistent hum (air conditioning, computer fans). Audacity’s Noise Reduction tool takes 30 seconds to apply and makes a noticeable difference in output quality.
- Normalize volume levels if different sections of your recording were recorded at noticeably different volumes. The audio normalization reference covers loudness vs peak normalization. Inconsistent volume makes it harder for the Voice Changer to calibrate the conversion accurately.
- Split long recordings into logical sections of 5 to 10 minutes each. Shorter segments process faster and give you more control over which sections to convert or re-convert if the output needs adjustment.
File naming convention: Name your source files clearly before uploading - something like intro-rough-take1.mp3 or lesson-3-narration.wav. Murf displays the source filename in the project view, and clear names save time when managing multi-segment projects. The WAV format reference covers the lossless container many production workflows prefer for source audio.
Once your file is uploaded, Murf displays a waveform visualization of the audio and a playback bar. Listen through the waveform view to confirm the upload is complete and the audio is intact before proceeding to the conversion step.
Step 2: Murf Analyzes and Converts Your Audio
After upload, Murf’s Voice Changer engine analyzes your recording before presenting you with voice selection and conversion options. This analysis phase typically takes 15 to 30 seconds for files under 10 minutes.
What happens during analysis:
The engine breaks your recording into segments at natural pause points - sentence endings, breathing moments, and significant pauses in speech. For each segment, it extracts the prosodic features: duration, relative speed, pitch contour, and emphasis patterns. This structural map becomes the framework the AI voice will follow during synthesis.
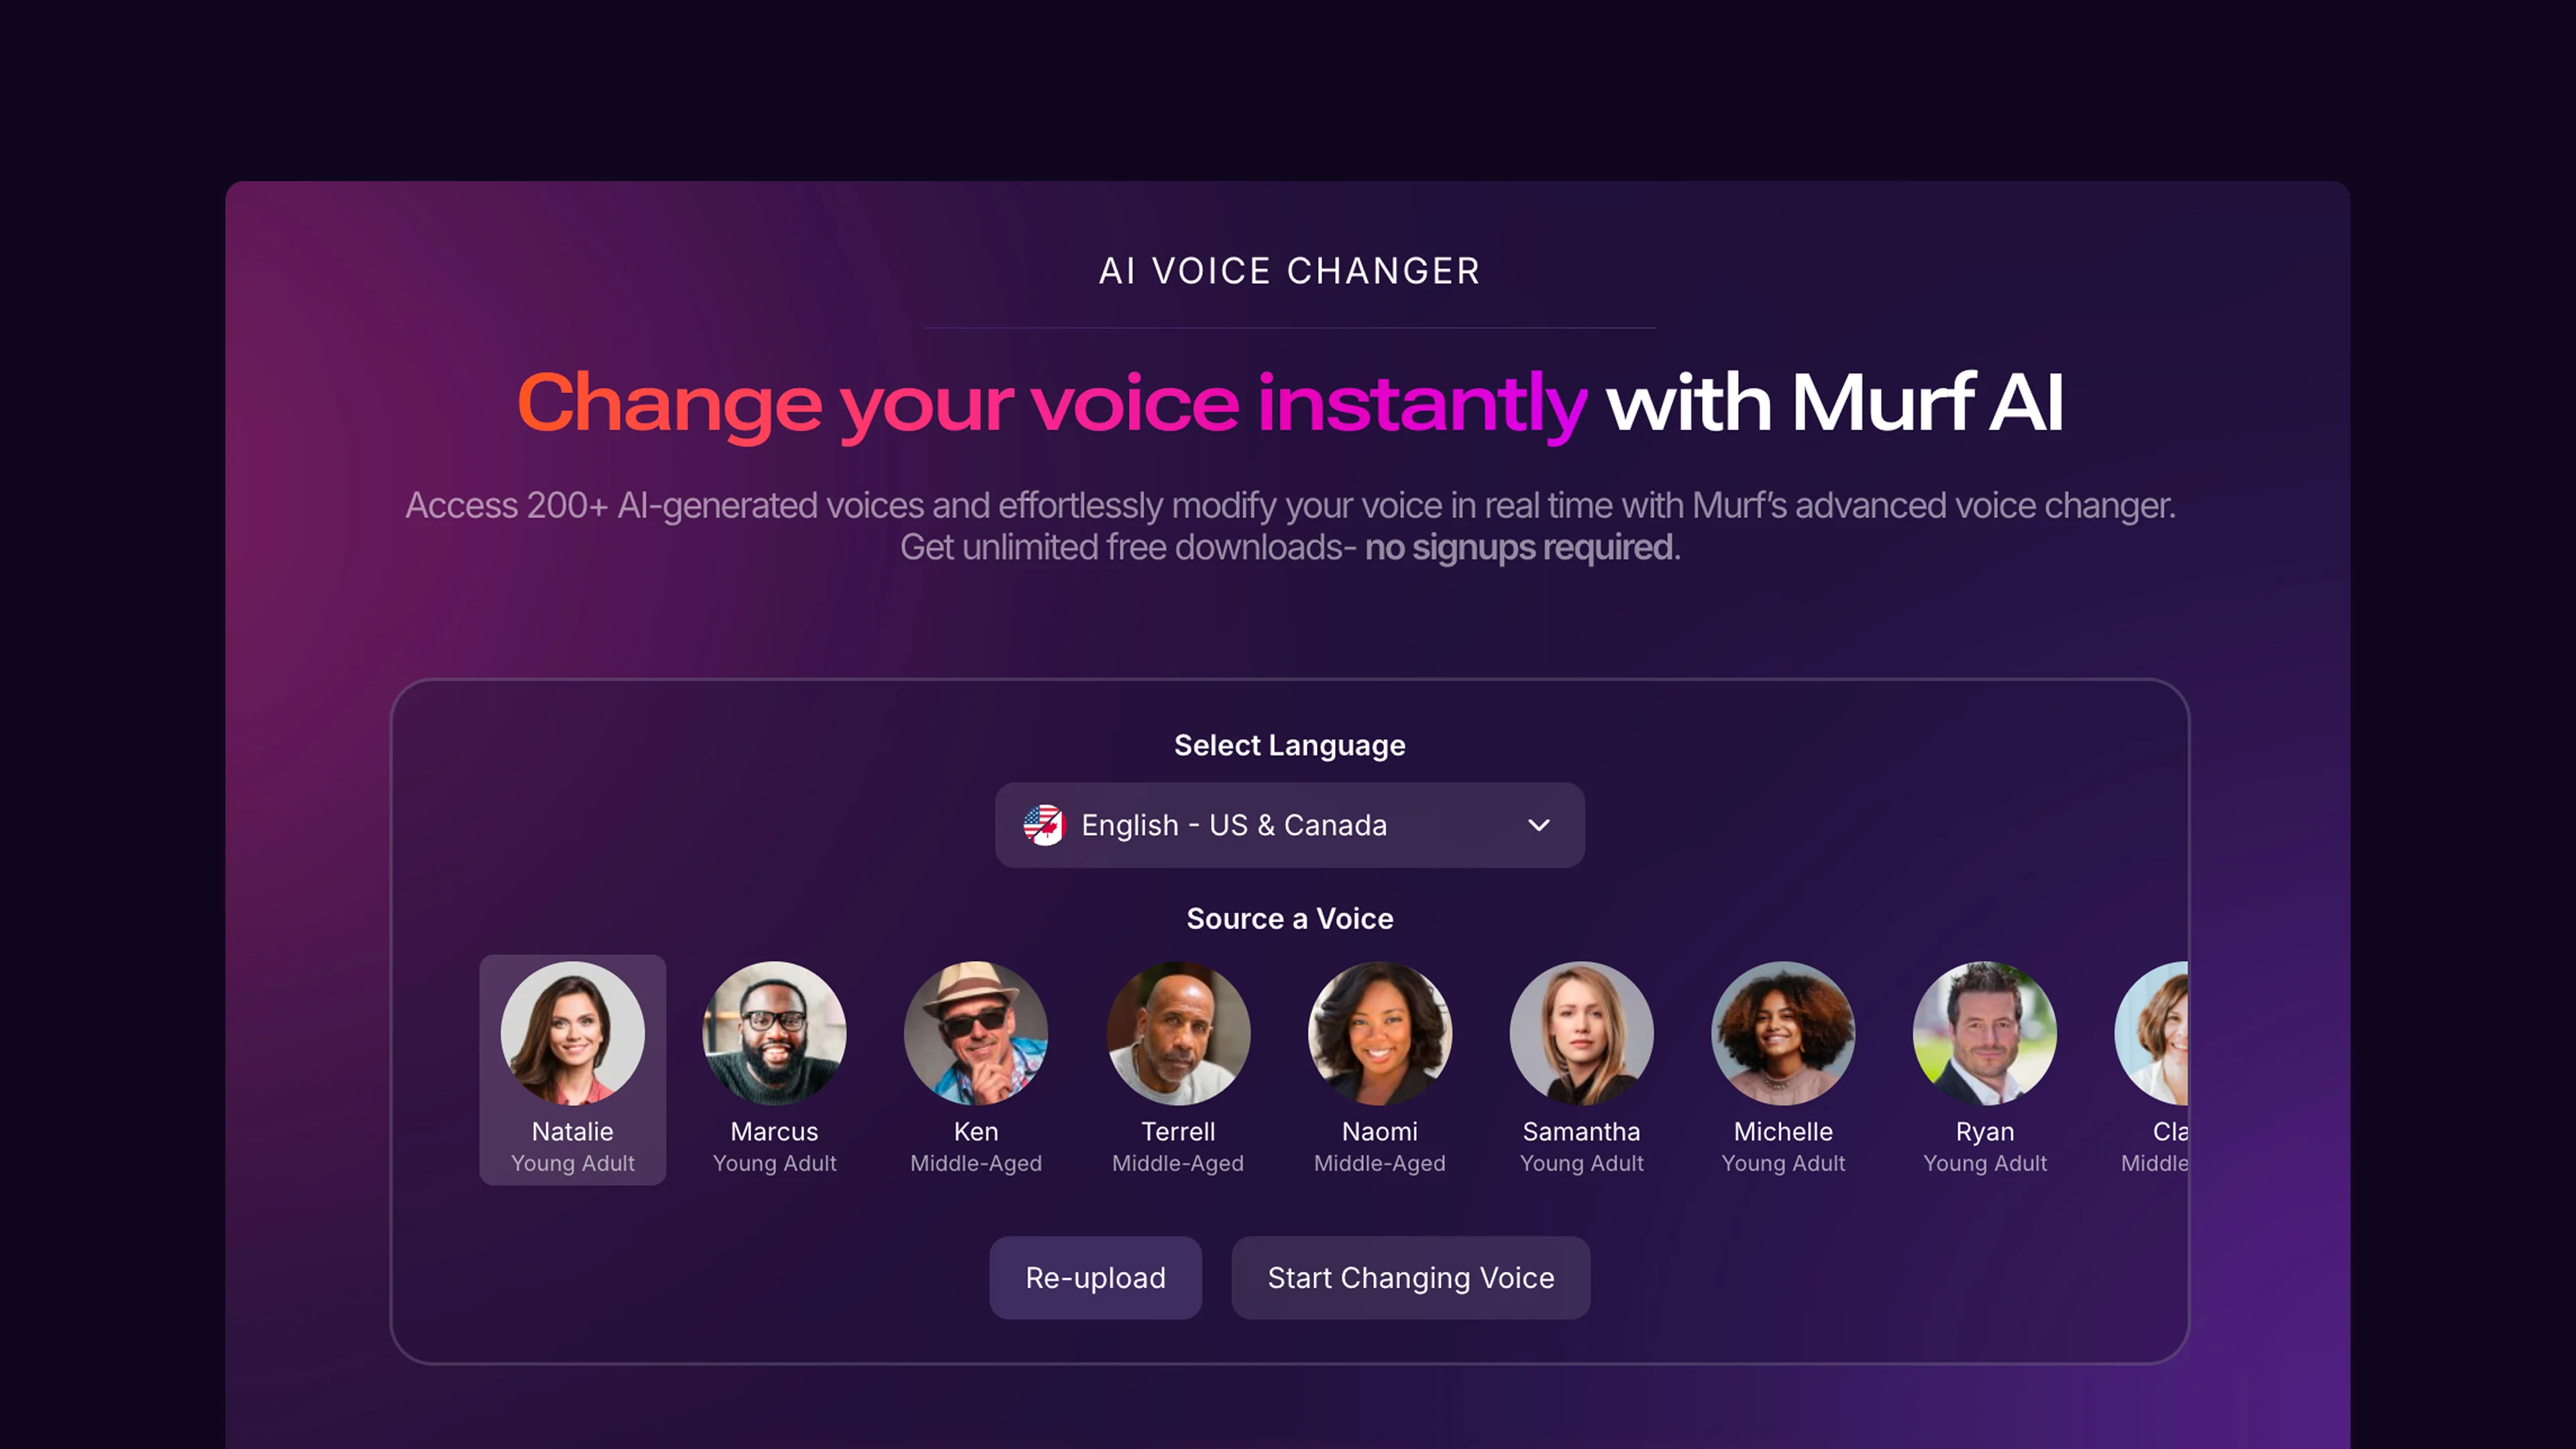
Selecting your target AI voice:
After analysis, the Voice Changer presents a voice selection panel. This is where you choose which of Murf’s 200+ AI voices will replace your original recording. Our Murf voice selection tips guide walks through systematic voice evaluation.
Filtering options to narrow your selection:
- Language - Voice Changer requires the target voice to match the language of your source recording
- Accent - For English, you can choose from American, British, Australian, Indian, and other regional accents
- Age and gender - Match the demographic of your intended speaker or choose a voice that fits your brand
- Use case tags - Tags like “professional,” “conversational,” and “authoritative” help match voice character to content type
Previewing before committing: Select 3 to 5 candidate voices and use the preview function to hear a 15-second sample of each voice delivering a neutral passage. This preview does not use your source audio - it generates a brief sample of the AI voice itself. Once you have narrowed down to one or two candidates, use the Preview on Source option (available on Pro plans) to hear how that specific voice will sound on a short segment of your actual recording before running the full conversion.
Running the conversion:
With your target voice selected, click Convert. Processing time scales with file length:
- Under 2 minutes: typically 30 to 60 seconds
- 2 to 10 minutes: typically 2 to 5 minutes
- Over 10 minutes: 5 to 15 minutes
A progress bar tracks the conversion. Do not close the browser tab during processing - if your connection drops, the conversion may need to be restarted. For long files, leave the tab open in the background and check back after the estimated processing time.
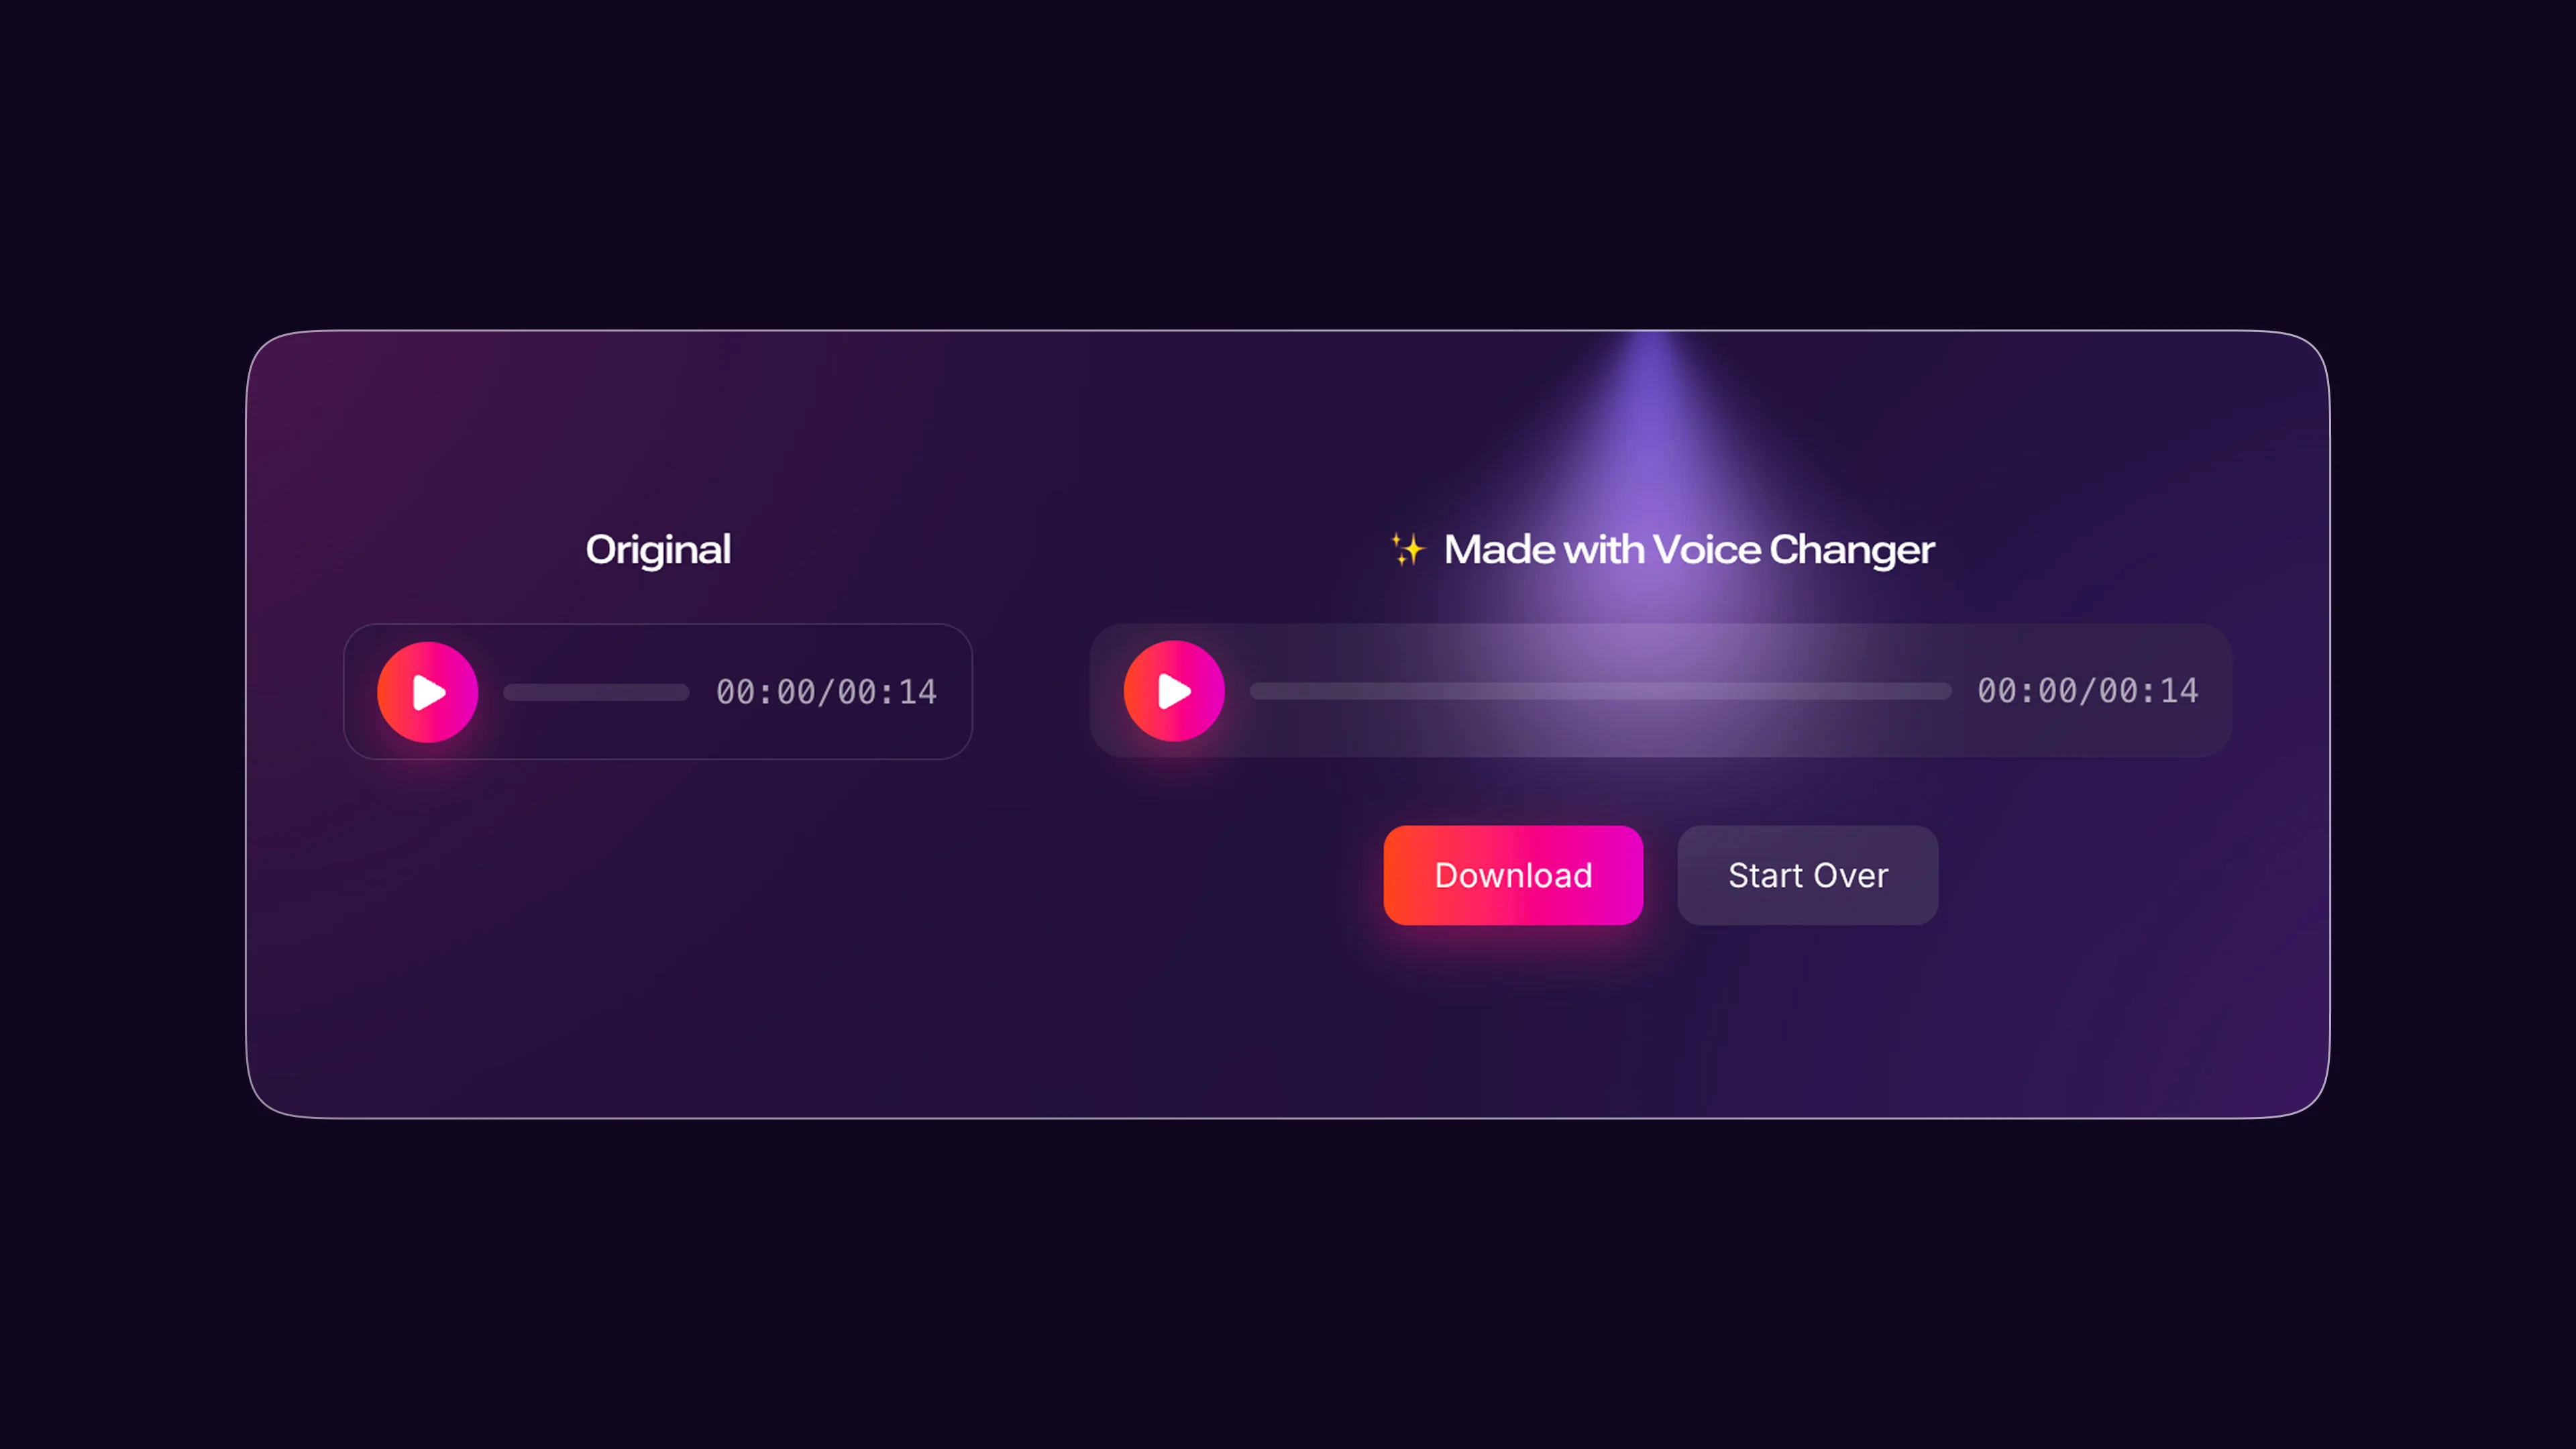
When conversion is complete, Murf displays the new AI voice audio alongside your original recording waveform so you can compare them side by side.
Step 3: Fine-Tune the AI Voice Output
The initial conversion gives you a strong baseline, but fine-tuning is where you close the gap between a decent output and a finished voiceover. Murf gives you several adjustment tools specifically for converted audio.
Segment-level adjustments:
The converted audio is divided into the same segments the analysis step identified. You can select individual segments and adjust them independently, which means you do not need to re-run the entire conversion if only one or two sections need improvement.
For each segment, you can adjust:
- Speed - Speed the segment up or slow it down independently of the rest of the audio. This is useful when the AI voice’s natural cadence does not match the pacing of your source recording in a particular section.
- Pitch - Shift the pitch slightly up or down. Small adjustments (5 to 10%) change the perceived energy of the voice without making it sound artificial.
- Pause duration - Lengthen or shorten the gaps between segments. If the AI voice rushes through a pause that you intended as a dramatic beat, add 300 to 500 milliseconds of additional silence.
- Emotion - Apply one of Murf’s four emotion axes (Happy, Sad, Excited, Serious) to individual segments - covered in detail in our Murf emotion controls guide. The original recording’s emotional delivery does not always transfer cleanly to the AI voice - a slight emotion adjustment on key sections helps match the intended tone.
Pronunciation corrections:
If the AI voice mispronounces a word in the converted audio, use the pronunciation editor to set a phonetic override - our Murf pronunciation and emphasis guide covers the workflow in depth. Common mispronunciations occur with:
- Brand names and product names that use unusual spellings
- Acronyms (does “API” get read as letters or as a word?)
- Technical terminology from specific industries
- Proper names for people and places
Click on the text transcription below the waveform, find the mispronounced word, and use the pronunciation tool to specify the correct phonetic rendering. Murf saves these overrides at the project level, so the same correction applies across all segments in your project.
Handling background noise in the converted output:
If your source recording had background noise, some of that noise may carry through the conversion as an artifact. Use Murf’s noise reduction setting (if available for your plan tier) to minimize residual noise in the output. Alternatively, apply noise reduction in Audacity as a post-processing step after exporting.
When to re-convert vs. adjust:
Re-run the full conversion if the output sounds fundamentally wrong - the wrong pacing, a mismatch between the AI voice character and the content, or widespread pronunciation issues that would take longer to correct one by one. Apply segment-level adjustments when the overall conversion is good but specific sections need tuning. The targeted adjustment approach is faster for most projects.
Listening protocol for review:
Do not approve the output based on a brief listen. Follow this structured review:
- Listen to the complete converted audio at 1.0x speed without stopping
- Note timestamps where anything sounds off - pacing, pronunciation, emphasis, or tone
- Apply corrections to each flagged section
- Listen through the corrected sections at 1.0x speed
- Do a final full-file listen at 1.25x speed to catch anything you missed at normal speed (errors become more noticeable at slightly elevated speed)
Step 4: Export Your Converted Audio
When the converted audio passes your review, exporting is straightforward. Murf supports multiple formats for different downstream use cases.
Choosing your export format:
| Format | Best For |
|---|---|
| WAV | Post-production editing, adding to a DAW, archival |
| MP3 | Web delivery, podcasts, LMS upload, social media |
| FLAC | Lossless archival with smaller file size than WAV |
| OGG | Web applications, game audio |
For most Voice Changer workflows, the decision is between WAV and MP3. Export WAV if you plan to edit the audio further - layering music, adjusting levels, or syncing to video in a separate editor (the Murf Google Slides voiceover guide covers presentation workflows). Export MP3 if the converted audio is going directly into its final destination: a podcast episode, an e-learning module, a video upload, or a slide deck.
Export options:
- Full project - Exports all segments as a single continuous audio file
- Individual segments - Exports each analyzed segment as a separate file, useful when you need audio clips that align to specific sections of a longer project
- With background music - If you added a background music track in Murf Studio, you can export the voice and music mixed together or as separate stems
Bitrate and quality settings:
On Creator and Pro plans, you can select the MP3 bitrate before export. 192 kbps is the standard for spoken word content and produces excellent quality at a reasonable file size. 320 kbps is the maximum quality option - use it for archival copies or content where audio fidelity is critical. The MP3 bitrate reference on Wikipedia gives a useful overview if you want context for how bitrate affects perceived quality.
After export:
Murf saves your project in Studio, so you can return at any time to re-export with different settings or continue making adjustments. This is especially useful when:
- A script change requires you to re-record a section and re-convert that segment only
- The destination platform changes (YouTube now, podcast later) and you need different export formats
- A reviewer requests changes after the initial delivery
Store your source recording files alongside your exported output. If Murf updates the Voice Changer engine, having the original source allows you to re-run the conversion and potentially get improved output without a new recording session.
What Advanced Tips Improve Voice Changer Output?
Using Voice Changer for podcast production:
For podcasters recording solo episodes, Voice Changer solves the common problem of inconsistent audio quality across episodes. The Murf podcast intro guide covers a complementary workflow for opening and closing segments. Record your episode at your normal setup - even if that means a mix of home office days, hotel rooms, or borrowed conference rooms - and run each recording through Voice Changer using the same target AI voice. The output is tonally consistent regardless of where the original was recorded. Apply this consistently across an entire season, and your back catalog sounds professionally produced even if the recordings varied significantly.
Using Voice Changer for product demos:
Sales teams and product marketers frequently record rough demo narrations against a screen recording. The actual product demo footage is polished, but the voice recording - captured on a laptop mic in an open office - sounds amateur by comparison. Voice Changer lets you keep the original timing (which is already synchronized to the screen recording) while replacing the audio with a professional AI voice. This workflow is significantly faster than re-recording the narration and resynchronizing it to the video.
Handling multiple speakers:
If your source recording contains two speakers - an interview, a dialogue, or a moderated session - you can convert each speaker’s turns using a different target AI voice to create a multi-voice production. The process requires splitting the recording at each speaker transition before uploading, converting each segment separately, and then reassembling them in Murf’s timeline editor or in an external audio editor. More labor-intensive than single-voice conversion, but the result is a fully produced, multi-speaker audio piece from a single rough recording session.
Batch conversion for course content:
Educators and eLearning producers creating multi-module courses can process multiple lessons in sequence using Voice Changer. Our Murf eLearning narration guide covers the broader course-content workflow. Upload the rough narration for each lesson, apply the same target voice and settings across all of them, and export each module. The Voice Consistency Engine on Pro plans helps maintain consistent vocal character across sessions, so lessons recorded weeks apart still sound like they were produced in the same session.
Quality control with A/B comparison:
Before committing to a target voice for a large project, run a test conversion on a representative 2-minute sample of your content using three or four different AI voices. Export each output and listen to them in comparison. Our Murf voice selection tips guide covers how to evaluate voices systematically. The voice that sounds best on a short test sample is almost always the right choice for the full project. Discovering mid-project that the chosen voice does not work for your content type wastes time and generation credits on a full re-conversion.
Frequently Asked Questions
What audio quality does my source recording need to be?
The source recording needs to be intelligible - the AI cannot reconstruct speech from heavily distorted, clipped, or extremely noisy audio. In practice, a clear phone recording in a quiet room works well. Recordings made on a laptop microphone in a reasonably quiet environment are acceptable. Recordings in loud environments (open offices, coffee shops, outdoor settings) typically produce lower-quality conversions. If in doubt, run a short test conversion on a 30-second sample before processing the full file. The test result will show you whether the quality is sufficient before you commit generation credits to the full conversion.
Does Voice Changer preserve the original pacing and timing?
Yes. Preserving the prosodic structure - the timing, pauses, and emphasis patterns - of your source recording is the core purpose of Voice Changer. The AI analyzes these features and uses them as a template for the converted output. The result is that natural pauses you recorded, the slightly faster pace you used during a list, and the emphasis you put on key words all carry over to the AI voice. This is the main difference between Voice Changer and text-to-speech: Voice Changer preserves your performance, while text-to-speech generates a new performance from text cues.
Can I use Voice Changer to translate my recording into another language?
No. Voice Changer converts the voice in your recording while keeping the same language and content. It does not perform translation. If you need the same content in multiple languages, use Murf’s text-to-speech workflow with the MultiNative feature - paste the translated script and generate in the target language using a consistent AI voice across all versions.
How many times can I re-convert the same recording?
There is no limit on re-conversion attempts. Each conversion consumes from your monthly generation minutes, but you can convert the same source file multiple times with different target voices or settings. This is useful when you are not satisfied with the initial output or want to compare how different AI voices handle the same source material. On the Pro plan with unlimited generation, re-conversion is essentially free to experiment with. On Creator and lower plans, factor re-conversion attempts into your monthly minute budget.
Want to learn more about Murf AI?
Related Reading
Related Guides
- Getting Started with Murf AI
- Murf Studio Interface Walkthrough
- How to Clone Your Voice with Murf AI
- Murf Text-to-Speech Tutorial
- Choosing the Right AI Voice in Murf
- Murf AI Emotion Controls
- Murf AI Pronunciation and Emphasis
- Mastering Pacing in Murf AI
- Murf MultiNative: Multilingual Voiceovers
- Murf AI Dubbing Walkthrough
- AI Voiceover for YouTube Videos: Murf Workflow
- Murf AI eLearning Narration: Educator’s Guide
- Murf AI Canva Integration
- Murf Falcon API Tutorial
- Murf AI Free Plan Tips
External Resources
- Murf AI Help Center - Official documentation for the Voice Changer, supported formats, and processing limits
- Audacity (free audio editor) - The recommended tool for trimming silence, normalizing levels, and reducing noise in your source recording before upload
- Murf Voice Cloning and Voice Changing Resources - Vendor articles on getting the cleanest possible source recording
Related Guides
- AI Voiceover Corporate Training With WellSaid Labs
- AI Voiceover for YouTube Videos: Murf Workflow Guide 2026
- AI Voiceover Tips: Making Synthetic Voices Sound Human
- ElevenLabs Getting Started: Complete Beginners Guide
- ElevenLabs Voice Cloning Tutorial: Complete 2026 Guide
- Luma Dream Machine Video Tutorial 2026: Text-to-Video & Ray3
- Murf AI Canva Integration: Add Voiceovers to Designs
- Murf AI Custom Pronunciation: Say It My Way Guide (2026)
- Murf AI Dubbing: Complete Walkthrough | Complete Guide 2026
- Murf AI eLearning Narration: Educator's Guide | Review 2026